


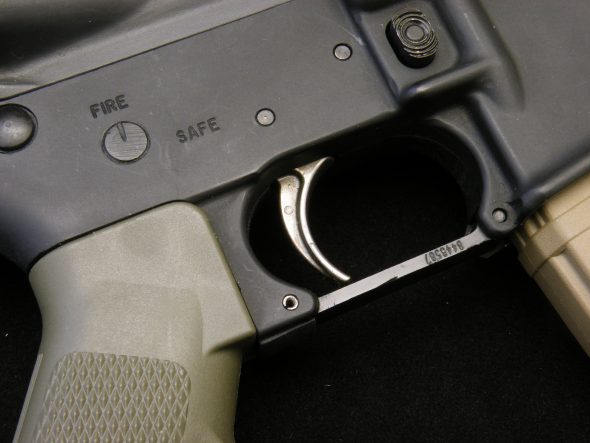
Are you lucky enough to have a lower with a set-screw trigger adjustment? I have an old lower from a company no longer in the firearm business… It features a set screw which allows the shooter to take some of the creep out of the trigger pull. It’s a neat setup that some lowers have, but not all. I like it.
“Well I don’t have such a lower so what’s that story mean to me?”
Whoah, slow down Mr. Grumpypants, we are getting there. I have seen a unique little product online that retails for 14.95 and allows you to take up some of the creep in the same way as the lower receiver I own:
Enter JoeBob’s AR15 Grip Screw!
You have done it again JoeBob. You hillbilly genius.
Basically, it’s a screw inside a screw and it does the same job as my fancy lower receiver!
“Well Lothaen, I think that’s kinda expensive for what it is. No Sale”
14.95 x (amount of lowers you own) + shipping = wallet crying. Yea, if you are like me,you would need several (many) of these screws. Is there a better (cheaper!?) way?
Surely I can accomplish the same goal with less cost right? That’s why I decided to give it a go myself!
I noted one morning that many of my lowers were threaded all the way through the grip screw path into the receiver’s FCG area. Well, some mornings when I have enough coffee I can get a bright idea!
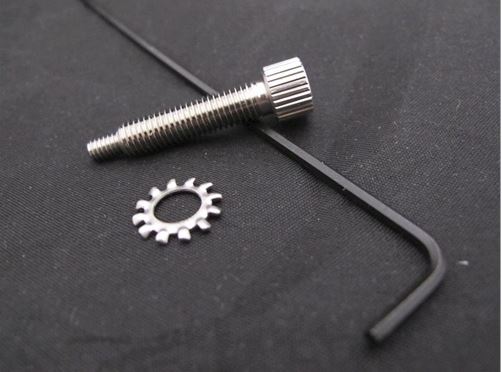
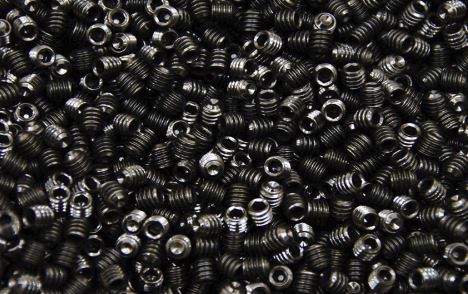
I found the following on Amazon: 1/4-28-1/4 Set screw Hex Head Set Screw, Cup Point, 100-Pack
The 100 pack of set screws was ordered PROMPTLY and VIOLA! I have a lifetime supply of sets crews to take a small amount of creep out of not only my triggers, but my brother’s, my cousin’s, my neighbor’s, my neighbor’s dog’s, and the sheriff’s AR15s!
“We Are Legion!” No, shut up, you’re a 100 pack of set screws. Stop being so dramatic already for once, geez.
So how does it work!?
This is a simple concept. When we want to reduce some creep on a USGI trigger, we want to mechanically shorten the pull. What these set-screws will do is allow you to slightly shorten the trigger pull by slightly lifting the tail of the trigger with the set screw.
As you tighten the set screw, it peeks further into the receiver and it lifts the tail of the trigger assembly thus removing some creep. Eventually the tail of the trigger will contact the safety. This is where we stop and back off the setscrew until the safety can be moved freely from safe to fire without resistance. If the setscrew is snug, the safety will not rotate as the tail of the trigger is wedged against it.
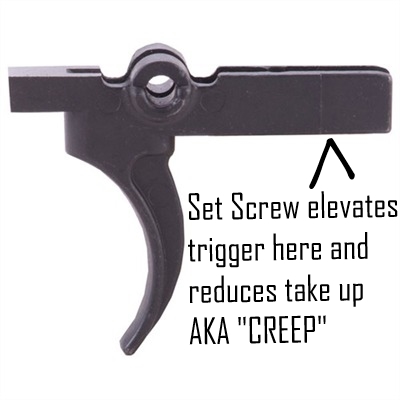
This trick only works in receivers which are threaded all the way through. Some receivers aren’t threaded all the way into the FCG area from the grip screw hole. If that’s the case, you’re gonna need a tap and that’s a bit more complicated of a job. If you’re not comfortable chasing threads and tapping it a bit further through, then google JoeBobs Grip Screw… it will carry out the same goal… at a higher price. Or just go buy a MBT or ALG trigger or something.
Step by Step:
Disclaimer: The following should only be preformed by a qualified gunsmith, proceed at your own risk.
FIREARM IS UNLOADED. Remove Fire Control Group.
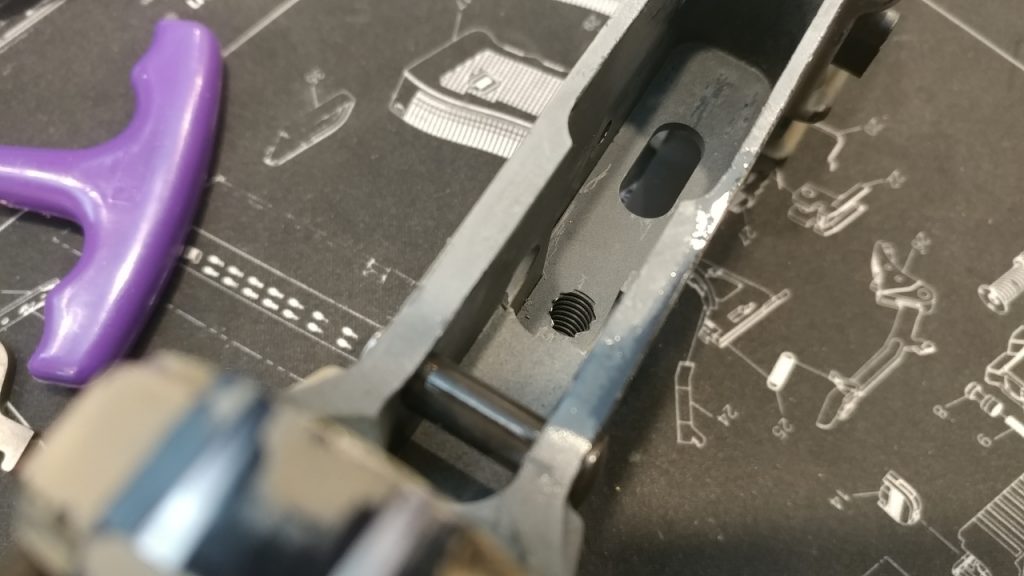
In this example, the manufacturer threaded the grip screw all the way through to the FCG area. This is just what we want for our set-screw trigger job.
1: Inspect receiver to make sure grip threading extends into receiver as above
2: Remove grip, screw, safety plunger, plunger spring
3: Apply blue loctite to 1/4-28 set screw
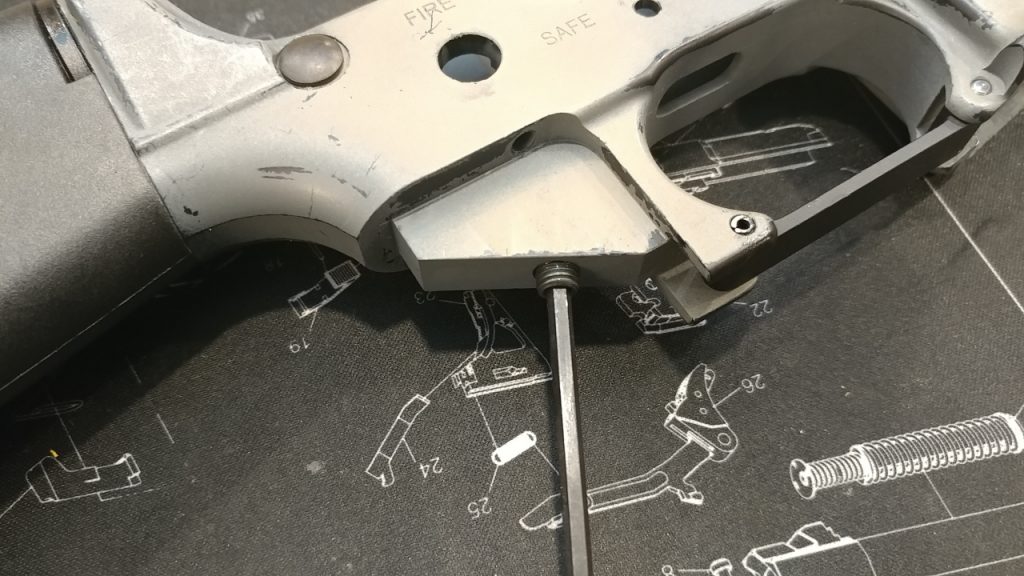
4: Thread set screw into grip screw hole until it sits near the interior of the receiver
5: Re-Install FCG, make sure that safety is in place
6: Tighten set screw until you meet resistance: the tail of the trigger has made contact with the safety
7: When sufficiently snug, the safety will no longer function and it cannot be turned from “SAFE” to “FIRE” and vice versa.
8: Begin to back off set-screw slowly until your safety moves back and forth from “fire” to “safe” without resistance.
9: Reinstall grip, safety plunger, spring, and allow loctite to dry.
10: Function test: cock hammer, engage safety, pull trigger as you hold hammer with palm. Do not allow hammer to strike receiver. Keep holding trigger and with palm push hammer back towards FCG to make sure disconector engages. Release trigger. Hammer should release from disconector and remain cocked. Re-install upper receiver and function test by charging rifle, dry fire, cycle bolt, continue until satisfied.
Wrapping Up:
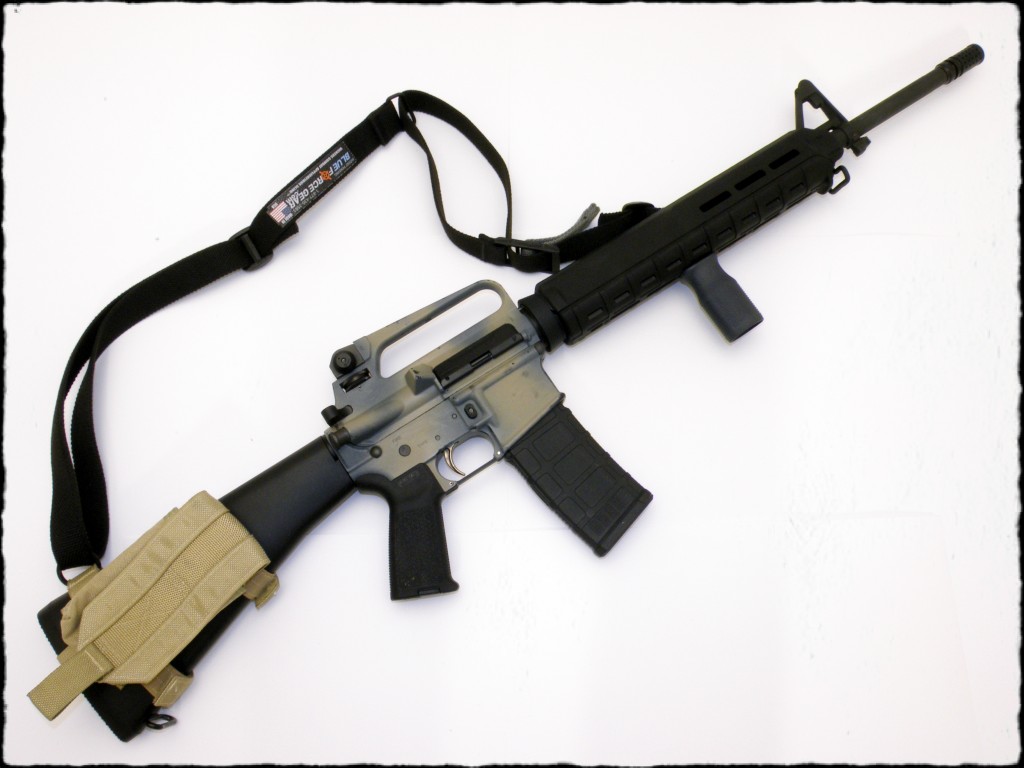
This install should “hold me over” (ha-ha ballistics pun) until my MBT comes in the mail. It’s going into the above rifle. VIVA LA A2!
Simple method, good results. It won’t fully remove all grip and net you a match trigger, but with a mil-spec trigger it will noticeably reduce the creep. It’s not national match anything, but with a bit of ingenuity you can improve every mil-spec trigger in your armory for pennies. Would I use this on a defensive rifle? No. Your *primary* rifle should be equipped with a quality trigger. On my secondary rifles, I would trust the set screw after hundreds of trouble free rounds. Plenty of thread locker is important. I used blue… Red will not allow you to remove the set screw. Should you want to upgrade to an aftermarket trigger, the set screw will need to be removed. You want it secure, but at the same time you want it removable. Once you upgrade to a higher end trigger, the screw needs to come out.
Adios for now!
Lothaen OUT!


Nice. I love a hardware store hack. Well-Thought.
This is a cool little tip and just how I like them… inexpensive. =)
This is the best blog I have seen so far keep up and you will continue to be the best