


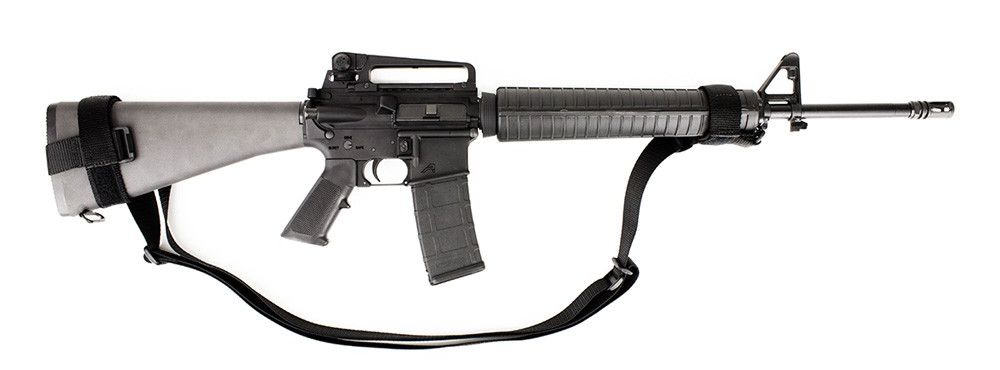
Irons
Antiquated? Yes. Do they still work? Absolutely.
The irons that come with, or these days don’t come with, your AR15 are misunderstood. Newbies just don’t have all the concepts mastered to adequately use and enjoy the irons that come with their rifle. The goal of this guide is to be the comprehensive post to help new shooters master their iron sights. When I say comprehensive, I mean it. There will be no better guide on the internet. None. So if your goal is to get a better understanding of your iron sights, you have come to the right place. Let’s get started with proper use and application. This article assumes you have a proper understanding of sight in procedure, and will attempt to inform you of the nitty gritty details of iron sight usage. If you want to watch a video before we begin on how to sight in your AR15, Click Here for my video on 25 yards to 300 to help understand sight in procedure.
The AR15 Irons: Essential Concepts
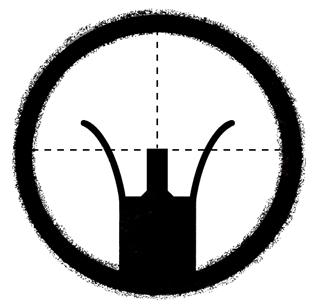
Sight alignment and the proper shooting sequence are concepts that can be a little foreign to new shooters. Throw a AR15 in a new shooters lap, someone who has never used peep sights, and you’re likely to confuse him/her as to their proper use. With today’s generation growing up with some very accessible military shooters, many may have an idea what the sight alignment should look like… in theory, but formal education is still needed. Modern games often represent a crystal clear sight picture with everything in focus, but unfortunately iron sights and the lenses in your eye will not and do not work that way.
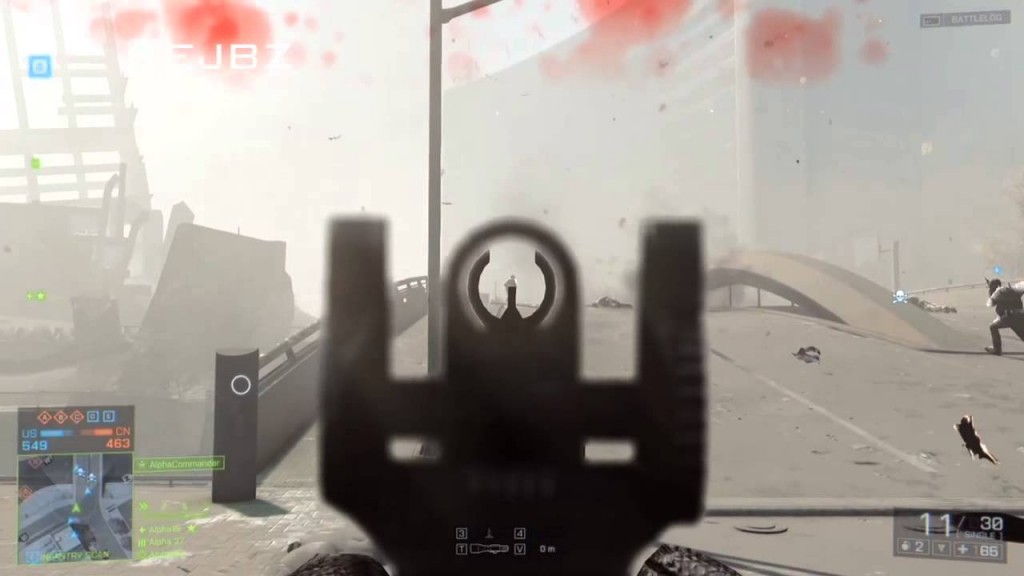
In video games, the representation of iron sights typically depict everything in focus except the rear sight. Unfortunately, the human eye does not work that way. Focusing on the target will fuzz the front sight, or focusing on the front sight will slightly fuzz the target depending on your sights aperture size, and distance between the sights. If only it were as clear as the above example makes it out to be…
When using iron sights on an AR15, we must make note that the rear sight is divided into two different systems: the Ghost Ring and the Peep. The key visual difference is that one aperture is larger than the other. While at first glance it would appear that their use would be identical, certain characteristics make each unique to the target and situation in which you may be shooting. Before we discuss the differences, let’s break down proper shooting technique for those who may be new to the platform.
Are you so new that you don’t even have iron sights?! Check out some iron sight sets from Brownells.
Your rifle or carbine relies on you to properly align the target with the sights and it relies on you to squeeze the trigger in a smooth fashion as to not disturb their position relative to the target. In a simple breakdown of the concepts of iron sight shooting, you must:
- Align the sights
- Align the sights with the target
- Squeeze the trigger while maintaining focus on the target / front sight alignment
- keep squeezing
- Fire
All of the above are essential components of a successful shot. The AR15 has a set of two aperture sights with different methods for use, the peep and the larger (often marked 0-200) ghost ring. Unlike the open sights of an AK47/74 platform or, perhaps your fathers 30/30 lever gun, the ghost ring and peep are positioned to allow you to shoot without further alignment necessary from the rear. With the eye so close to the peep sight / ghost ring, it forces rudimentary alignment of the eye, the rear sight, and the front sight. So long as your looking through the hole, your rear sight is pretty much aligned with the front sight. This knowledge alone greatly simplifies shooting your irons. So what are the differences we mentioned between the ghost ring and peep in use and application? I am glad you asked!
Understanding the Ghost Ring:
The Ghost Ring is a large bore peep sight and standard issue on USGI carry handles and incorporated into many flip up rear sights. Unless specified, expect that the large aperture and small aperture will have a different zero. Some sights advertise “same plane rear aperture” meaning that both the large and small share the same zero if one or the other is flipped up. USGI apertures have different zero’s between the ghost ring and the small peep which is a difference in elevation of 2.5 minutes, or roughly 2.5 inches at 100 yards. Take note of this, but for now let’s ignore that aspect and discuss the use of the ghost ring.
The 0-200 marked Ghost Ring is a large aperture for low light and up close. It permits quick, snap shots from 0-200 yards.
The ghost ring is a simple, quick alignment tool useful for low light shooting and shooting targets in close proximity. The diameter of the hole in the ghost ring makes it important for the shooter to center the front sight in the visual field. The ghost ring is properly used with a target focus, meaning that your eye should focus on the target. Upon doing so, when you bring up the front sight, it will appear as a fuzzy mess since your focus is on the target. At close range, this is inconsequential. Put the fuzzy front sight on the target and pull the trigger with the emphases on speed rather than precision. *Improper* use of the ghost ring is to focus on the front sight. This will result in a crystal clear front sight, but a fuzzy target and absolutely dreadful target resolution. Using the ghost ring with a focus on the front sight will lead to the inability to see what your target is doing, and will hamper your ability to see targets even out to 100-200 yards. Ergo, focus on the target and bring the fuzzy front sight on to it and fire quickly. Or, if light is diminishing, it is essential to deploy the ghost ring as the small peep will darken the image resulting in poor low light shooting. This is, in a nutshell, the proper use of the ghost ring. There is a good reason it is typically marked 0-200 as it is your close range aperture. When properly zero’d, the ghost ring will have a rough 200 meter / yard zero which is perfect for its close range application.
Familiarizing Yourself With the Small Peep:
![DSCF3998 [1280x768 watermark]](https://www.thenewrifleman.com/wp-content/uploads/2013/09/DSCF3998-1280x768-watermark.jpg)
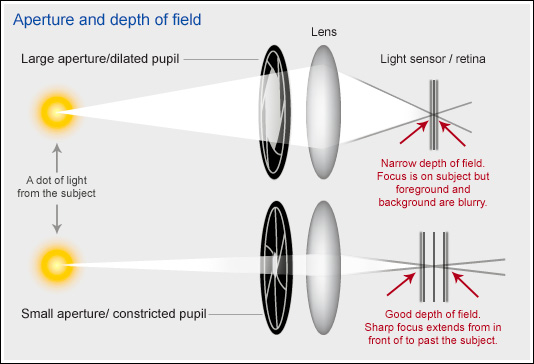
The peep sight. The small aperture. Here we get into the meat and potatoes. This .070 diameter hole is a wonder of old school rifle technology. It is very different than the ghost ring. This is a precision aperture useful for daylight shooting and for precision both up close or out far. The key to understanding this aperture is to understand the concepts of depth of field, aperture, and focus. Let’s get started on some terminology based on its use for the rifle:
Depth of field: Your ability to focus on the front sight, yet still see downrange with relative clarity. This is enhanced by the peep sight. This can be increased or decreased based on several factors which we will touch on later.
Aperture: The small hole peep is an aperture for which your eye, and the lenses in your eye, peer through to see both the front sight and the target
Focus: Proper application of the peep sight is to ignore it and focus on the front sight, not the target.
When using the peep, we are given certain visual enhancements… Let’s do a quick experiment. Hold out your finger at arms length. Focus on it. How fuzzy does the background become? Likely very fuzzy. This is because the naked eye can only focus clearly on objects near or far, but not both. The peep sight acts as an aperture for your eye, which is similar to a pinhole camera. Ever used a pinhole camera or a disposable? The aperture is very small and it only allows light rays from a very narrow cone of direction to enter the camera. This enhances the depth of field allowing the camera to focus on something up close, yet still see distant objects with excellent clarity.
With the peep sight, your eye is forced to peer through a small aperture that limits the angle of the light reflected off the target, the berms, etc to a very narrow cone. Your eye then can focus on the crystal clear front sight… yet still see enough detail downrange with enough clarity to align the sight with the target and shoot accurately. The ghost ring cannot do this, for it is too large…. So the peep lets your eye focus entirely on the crystal clear front sight and permits you to align it exceptionally well with a *relatively* clear target.
This example from a camera website does a good explanation of why depth of field is increased. This example mirrors the AR15 peep sight and the human eye (lens) very well.
Furthermore, the small peep suppresses parallax, AKA alignment error. Remember when we discussed forced alignment of the eye and the rear sight? Yes? Well that’s not the whole story. With the ghost ring, one needs to roughly center the front sight in the visual field otherwise you will drift the gun out of alignment with the target. The small peep does not suffer from the same degree of alignment error. It suppresses parallax error, meaning it fights back against misalignment by the very nature of its design. So long as you can see the front sight through the peep, you are nearly perfectly aligned with the front sight. The only time parallax error is added into the peep is when you let the front sight touch the fuzzy edges of your rear sight in your visual field. This has two implications: 1) nearly perfect alignment is already attained by the front sight and the small peep, and 2) the shooter can then ignore the placement of the front sight in the “exact center of the visual field” and instead focus on aligning the front sight with the target exclusively. It’s quite amazing to me that such an old design is nearly parallax free in a similar manner as a modern red dot sight. wow. Having this knowledge permits you to speed up the process of shooting instead of wasting mental resources on getting everything *perfectly* centered. It enhances speed on target and allows faster hits and follow up shots.
So the small peep is an excellent tool so long as you understand its peculiarities. It’s a fantastic instrument for shooting with the naked eye, and far more advantageous to the shooter than AK-47 type notch sights. So what other things affect your iron sights? Let’s talk about sight radius next.
Sight Radius: Longer is Better
You may have heard the longer the sight radius, the more precise the shot? Sight radius is the distance between the front and rear sight. The longer the distance, the more precise you the shooter can align the sights and hit the target. There is more to it than that though. Of course there is. Remember how the small peep allows us to focus on a clear front sight and still maintain good target clarity? Well, it’s not a hard and fast rule. As we decreased the distance between the front and rear sights, we disrupt the ability of the peep to compensate with that nice, deep depth of field effect. As the front sight is brought closer (the front sight being our proper focal point for using the peep sight) our depth of field, or target clarity downrange, decreases. Focusing on an object which gets closer and closer to the peep diminishes the effectiveness of the depth of field reduction. From rifle length sight radius, to carbine length sight radius, the reduction in visual clarity is a small but noticeable between the different sight length systems. Can you still shoot a target at 400 meters with a carbine? Certainly. It will just appear slightly fuzzier than when using a rifle length sight radius.
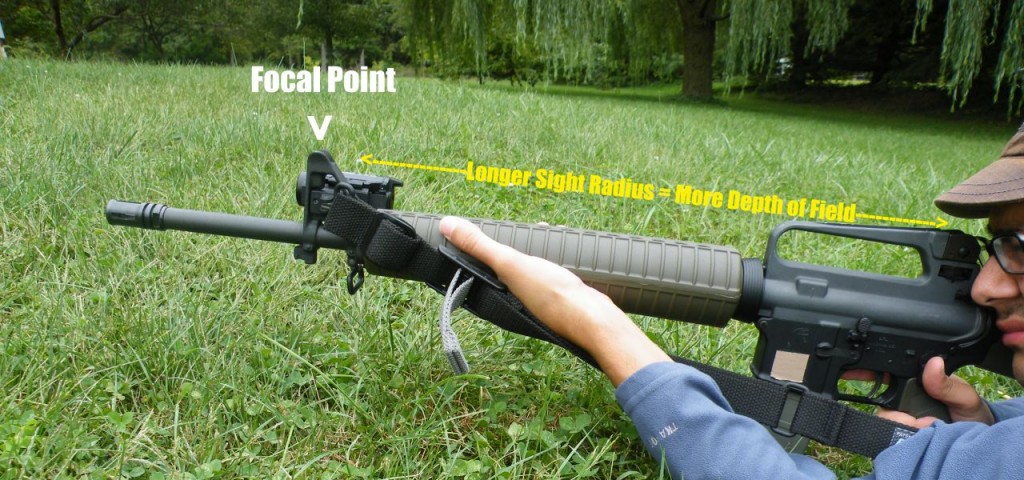
The further down the barrel the front sight is (the focal point) the more the depth of field, or clarity of the target, is enhanced with the small peep sight. As we bring in the focal point closer to the eye, depth of field downrange deteriorates and the target becomes cloudier and less clear.
To combat this, we have to reduce the diameter of the peep. In my own experiments with national match peep sights, reducing the aperture size helped reduce this effect. In fact, dropping down to a .042 aperture increased my depth of field with both rifle and carbine to that which far exceeded a standard aperture on an USGI peep sight. The cost is light. As we shrink the peep size diameter, we reduce the light which reaches our eye. As the sky darkens, we need to switch to the ghost ring sooner than someone with a standard size peep.
So if you have a shorter sight radius, installing a smaller peep (if you can find one) will help you maintain proper focus on the front sight and still see the target clearly. Your other options are to extend the sight radius by say replacing your carbine length barrel with a dissipator style build, or a barrel with a midlength front sight block, both of which will extend the sight radius past the carbine. The other option is to chop your front sight off above the gas block and then obtain a long free float rail which will permit you to mount a flip up sight further down the rail. I would recomend this setup for shooters running an optic or irons, but not an exclusive iron sighted rifle. If only using iron sights, make sure they are attached to the barrel and not the rail. Any flexion to a rail will possibly deflect the irons depending on how stiff or loose it is.

The DPMS Kitty Kat carbine has a very short sight radius. The whole idea on focus on the front sight for precision shooting would be hindered by such a close focal point, and would make your target a blurry mess. This carbine would benefit from a red dot to take the sights out of the equation, or just use the Ghost ring for snap shots. Shooting for groups with just irons may prove difficult.
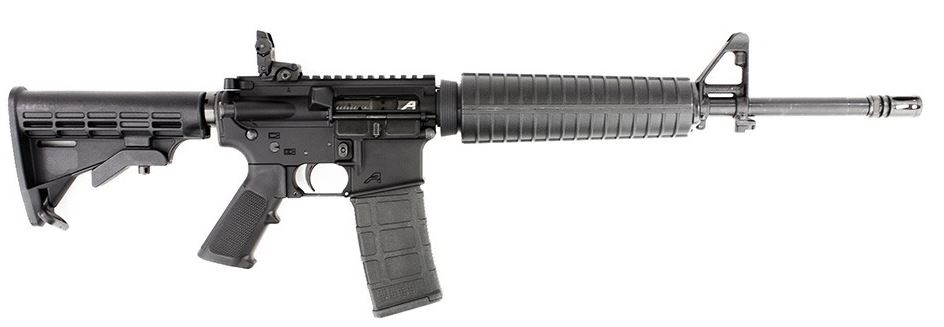
This carbine has a mid-length gas system and fixed front sight base. This stretches the sight radius out further and makes the irons more user friendly.
Correcting Common Range Errors:
The biggest error I see at the range is improper placement of the rear sight. Many shooters will attach the rear sight midway down the rail and further away from the eye. This is incorrect. What it appears to the new shooter is that they are forcing better alignment since there is less room for the front sight to wiggle around in the rear sight / peep. In truth what they have done is reduce the depth of field enhancements of the small peep to zilch, they also leave very little room for the front sight to NOT TOUCH the edges of the peep which is where we introduce parralax error, and they obstruct their view with the full rear sight instead of looking through the peep at point blank eyeball range and allowing a larger field of view.
This image hosted on lucky gunner is a perfect example of how to improperly position the peep sight. Click it here, it will pop up in a new window.
The above is also related to shooters who put their face waay back on the stock. While they haven’t reduced sight radius, they are trying to “improve” alignment because they are ignorant to the peep and its natural tendency to line everything up for them… Or they are first time shooters scared of the gun. It’s really hard to just start showing a new shooter the proper technique when its clear they are enjoying themselves at the range. The word MYOB quickly comes to mind, but ideally we can educate a new shooter on the proper use of the rifle. Approach them with confidence and compliments to their rifle, and make small talk. If they are talkative, compare rifles, setups, and just keep up the conversational momentum. Ask them if they would like to shoot at the local competition. Invite them for a run and gun. I promise you they will realize real quick what works and what doesn’t if you can convince them to come. It’s a hard sell, but an important one. We need to be a nation of shooters.
Another range error would be incorrect sight tracking for the mil-spec carry handle. As can be clearly seen, its drum is labeled for bullet drop compensation out to 600 meters using 62 grain SS109 green tip. The sight features 1/2 minute by 1/2 minute windage and elevation adjustments… but wait…
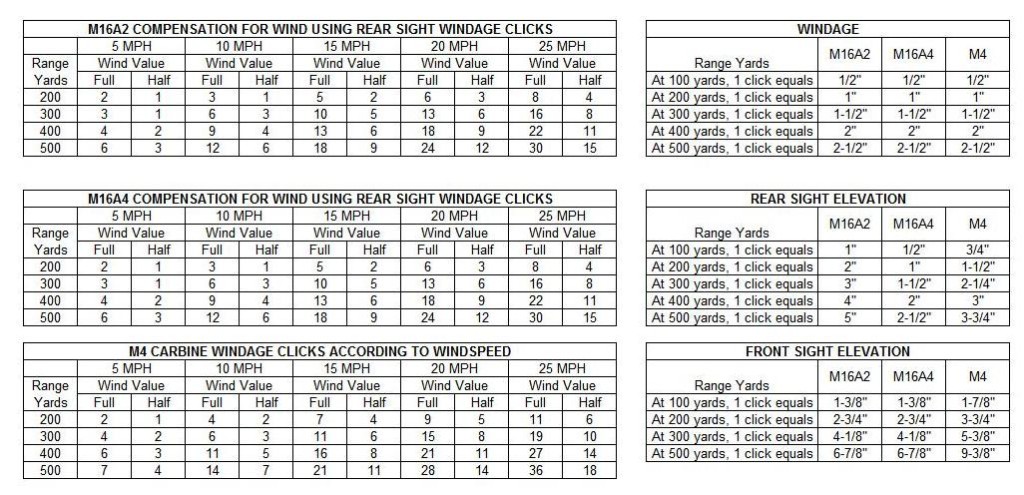
Amazing amount of data: Image provided by Shawn of www.looserounds.com
Do you see the rear and front sight elevation table? The M16A2 is a 1 minute x 1/2 minute windage and the M16A4 and M4 both use the 1/2 x 1/2 minute detachable carry handle. The only problem with that is the detachable carry handle was designed to compensate for the bullet drop based off the geometry of the M16A4’s sight radius. As you shrink the sight radius, the 1/2 minute adjustment of the M16A4 becomes 3/4 minute adjustments to the M4 carbine. The front sight faces the same problem. Adjusting the front sight with the shorter geometry results in more aggressive clicks. That Kitty Kat we pictured up there? No idea how it would adjust. If you need a short gun, you need a short gun, just don’t expect the adjustments to match what they should be on paper as you deviate from the M16’s rifle length sight radius.
The M16A2 and A4 variants have the correct sight radius geometry to match the actual click adjustments made to the detachable rear carry handle.
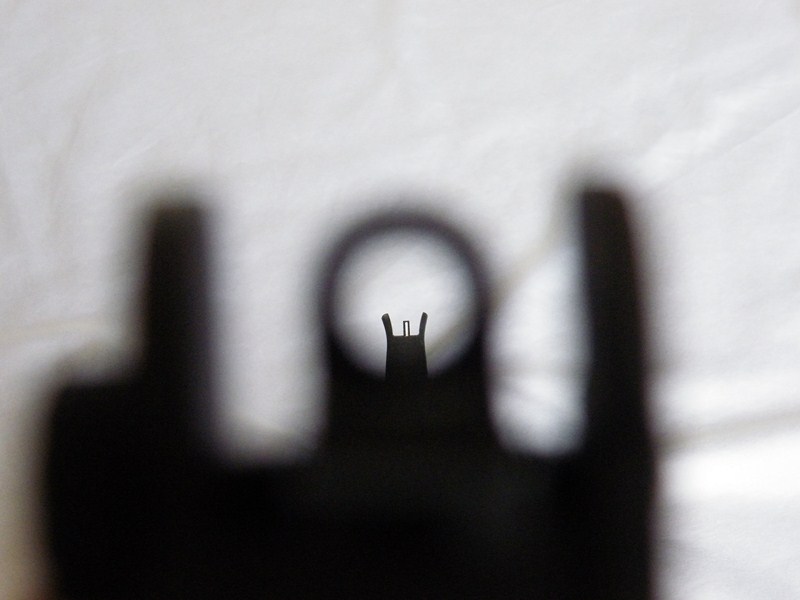
Another common range error is a long held belief that the peep must still be centered perfectly in the center of your visual field. Misalignment error is greatly reduced with the SMALL PEEP but must be followed as best as possible for the Ghost Ring.
The above sight picture represents old thinking in that you must align the front sight perfectly in the center of the ghosted ring which isnt entirely true. Due to parallax suppression, the movement of the front sight outside of “exact” center is of insignificant consequence for defensive shooting. A excellent study on the subject can be read here: Parallax Suppression with Target Aperture Sights.
In the above mentioned study, the authors evaluate parallax error in regards to an aperture sight. The aperture sight, in a nutshell, greatly reduces parallax error and the shooter can focus instead on perfect alignment with the target so long as the front sight is roughly in the center of the peep. Don’t sweat if its off center a bit, instead stress the front sights alignment with the target exclusively. This saves time and energy when coaching new shooters and promotes a cleaner method of familiarizing new shooters with irons. With the above knowledge alone, I coached a new shooter to 300 yards on man sized targets in his first magazine. It really simplifies the training process.
Using Irons in Low Light:
So when using irons for self defense, consider that they are limited by the amount of light that you can see yourself. Since they do not glow, or pop from a dark background, irons in the dark are not fun. Run a white, hot light. The hotter the light the better. This will bath your target in bright white light and allow your irons to contrast the target since they are black.
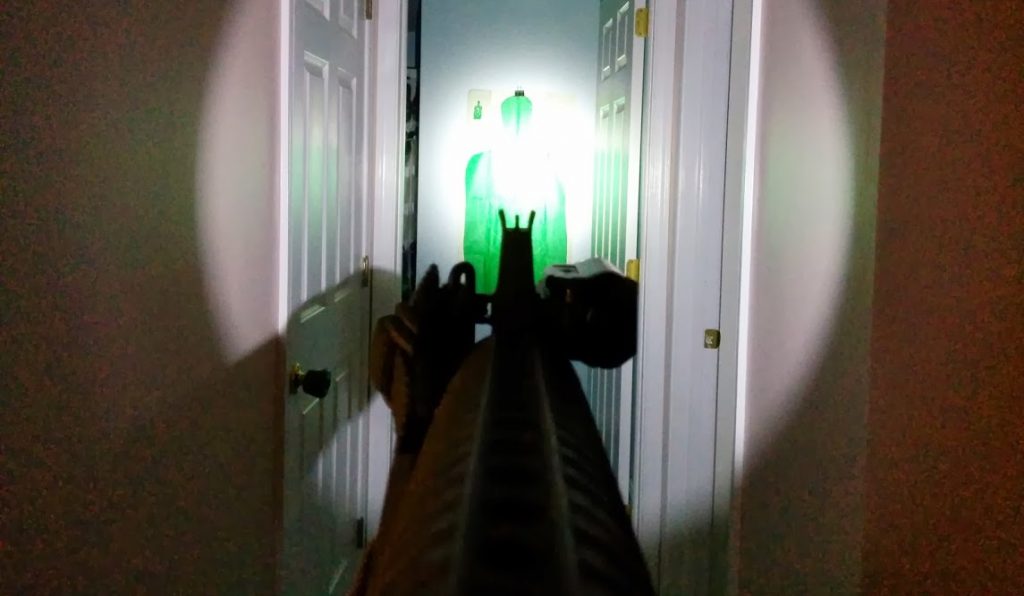
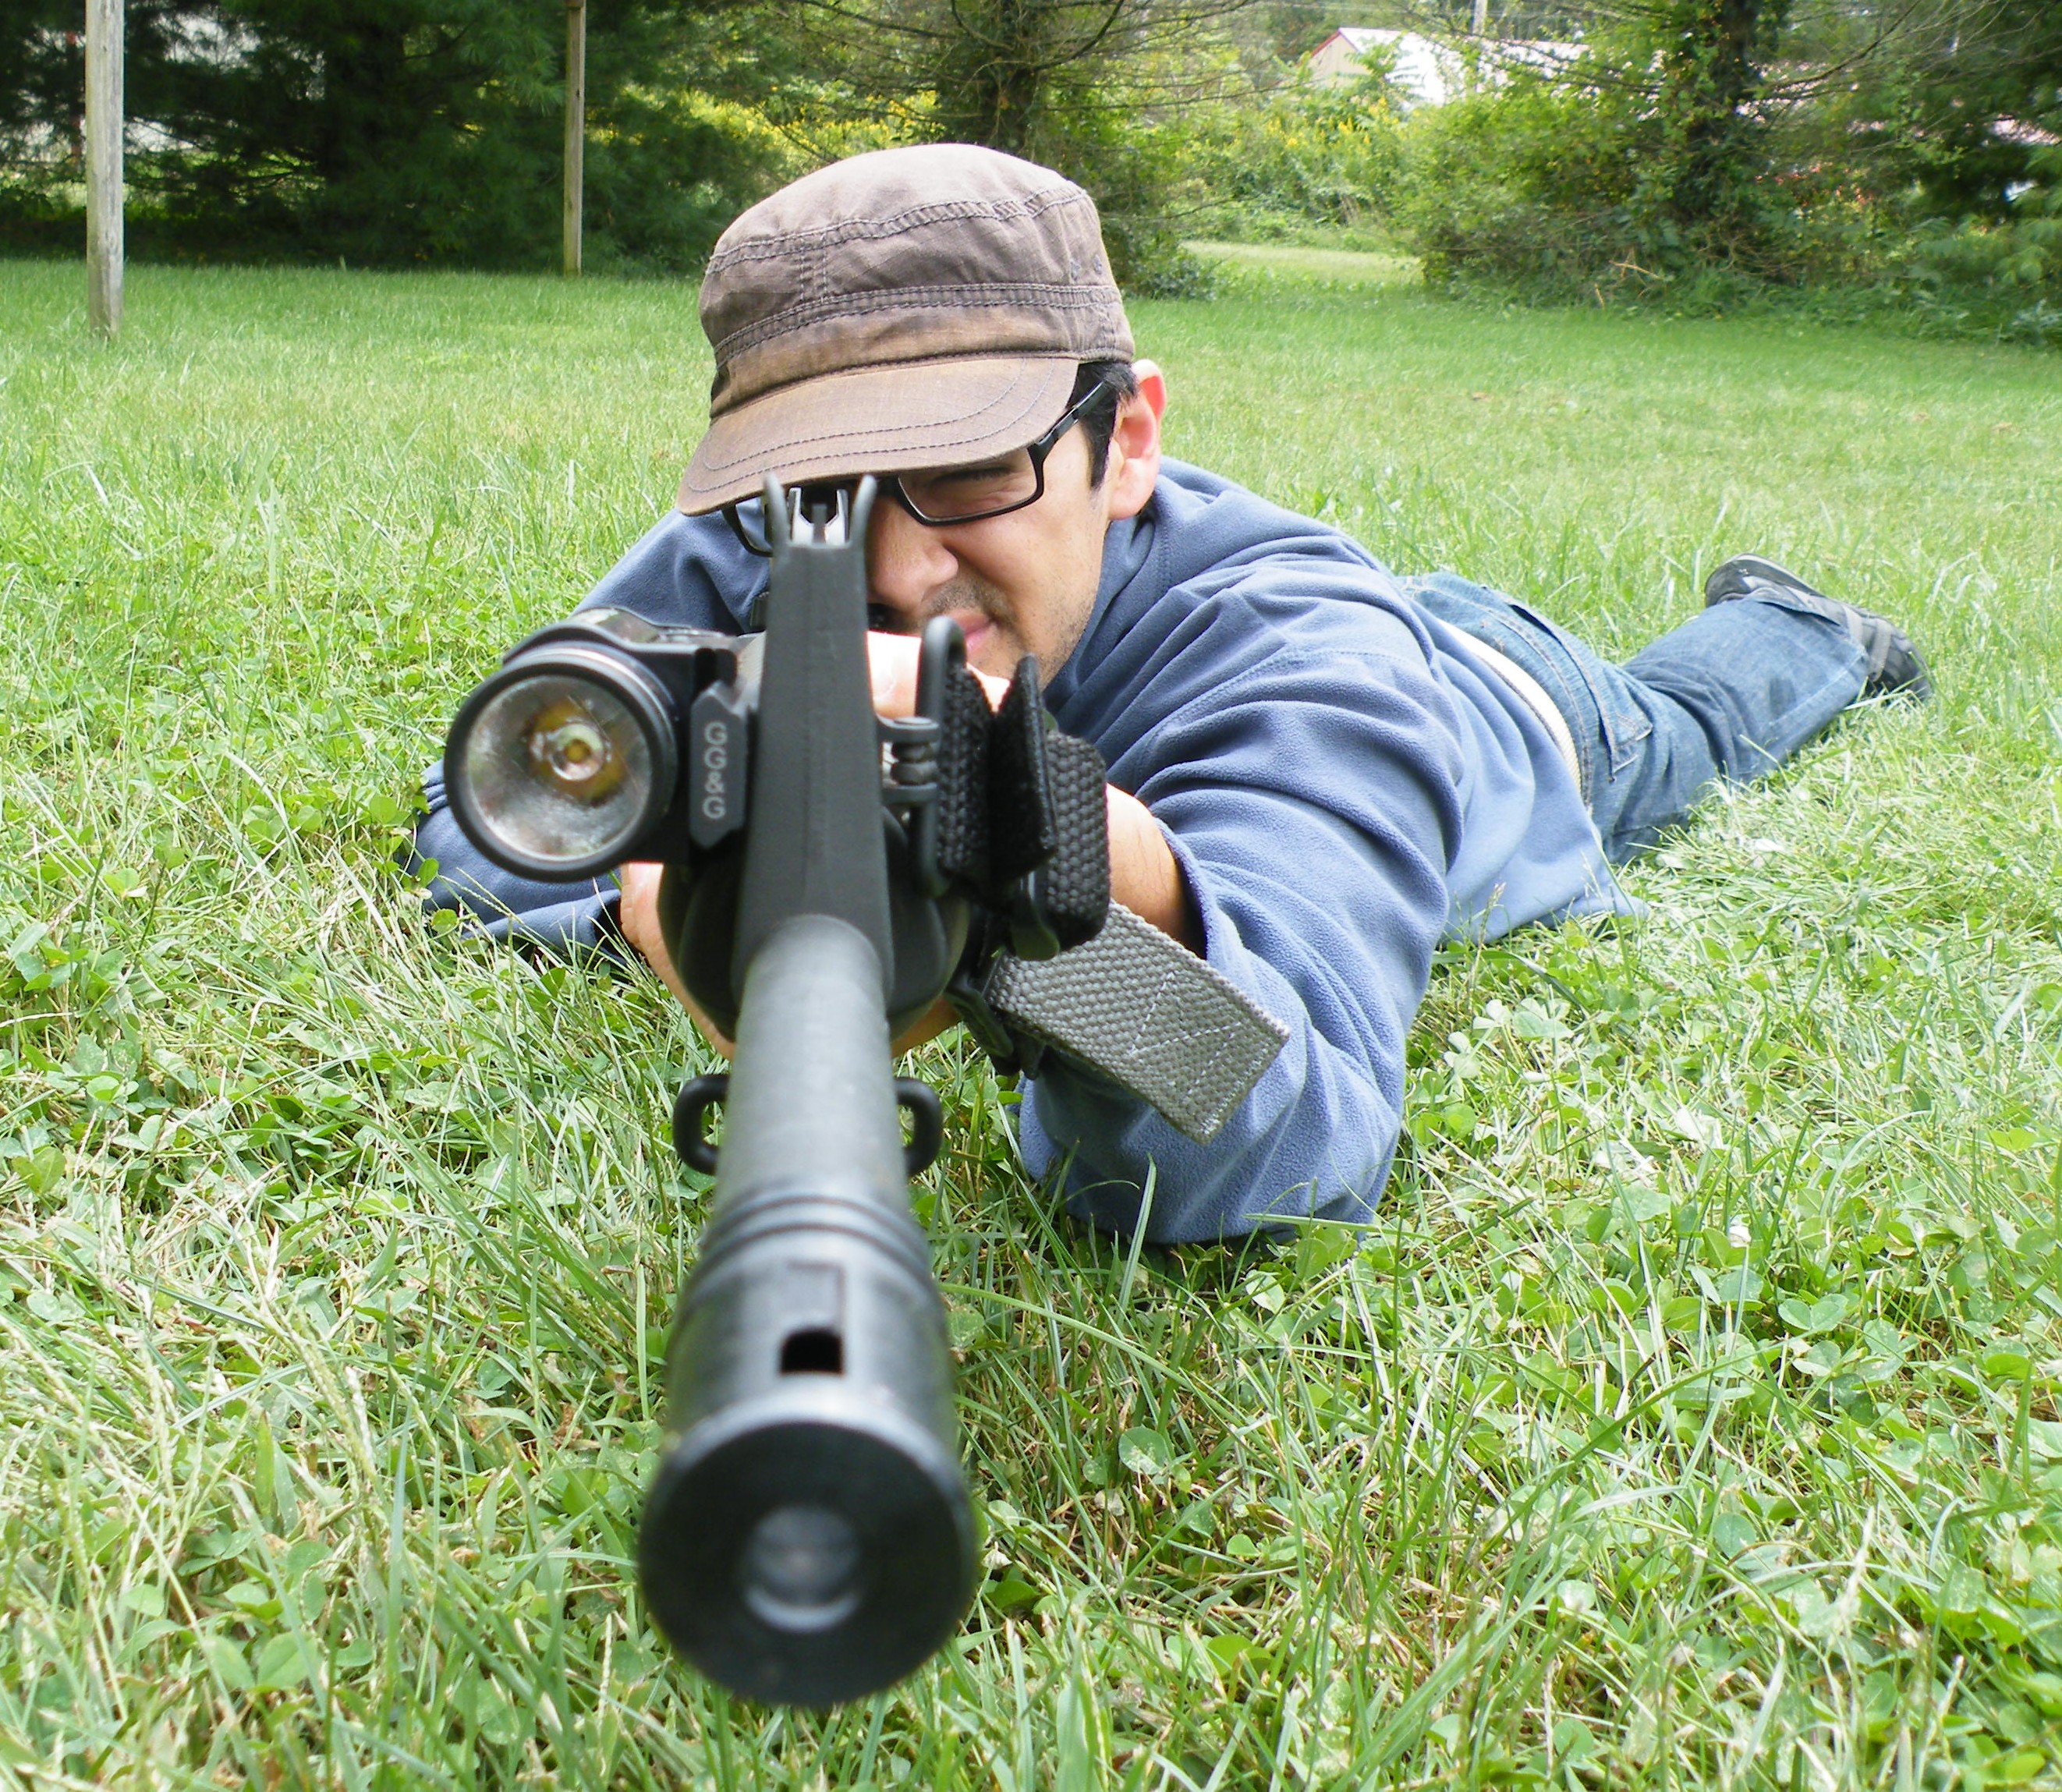
Irons in low light can be run well IF you have a bright light to allow adequate target, sight contrast. In this example, the target is so close that we can look over the top of the rear sight and instead quickly align the front sight and target yet still get a hit.
A tritium front sight can also aid with low-light shooting. While it won’t help you illuminate and identify your target, it gives a solid reference point in twilight for locating your front sight. The model below is from XS Sights:
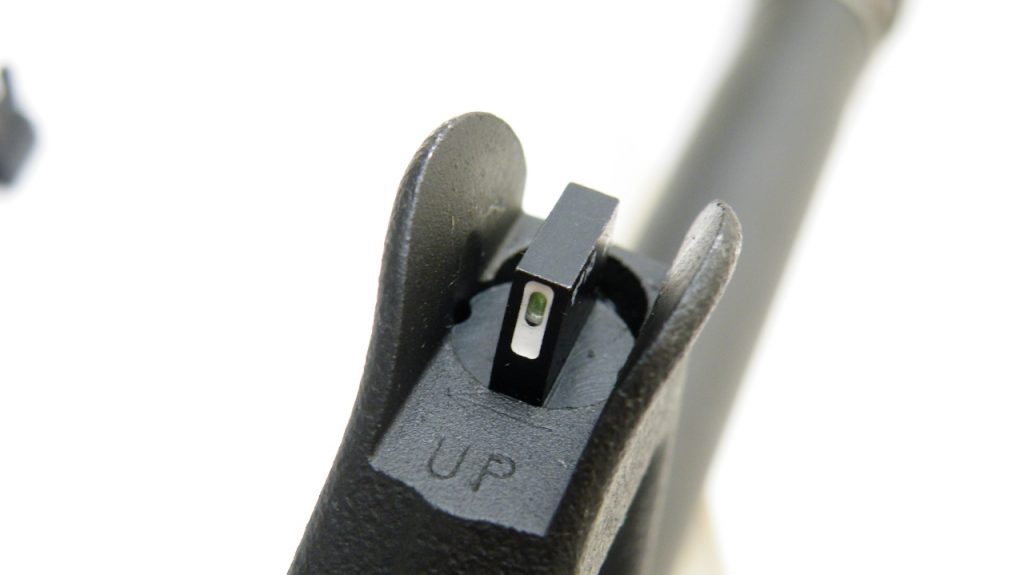
XS Front Sight offers a high contrast product with tritium illumination. Visit XS Sights Here.
Getting Zero’ed:
Now that you understand many of the concepts behind iron sights, it is time to get your zero on. I created a video a few years ago to get you up and shooting quickly with a 25 yard/meter military zero method for those using detachable or fixed carry handles. Due to the trajectory, or arch of the bullet, this method will produce a battle zero of 300 yards even though we zero’ed at 25 yards. If you are using a set of pop up irons without a drum adjustment, I would suggest a 50 yard zero since they are not easily field adjustable.
The video below will further discuss the following topics: Sight picture, method for sighting in at 25 yards, point of impact adjustments, sling techniques, and basic prone position shooting. Take what you learned above, study it, and apply it to your shooting. These are all keys to proper understanding and will allow you to take full advantage of your iron sights at the range.
Wrapping Up:
So we have some good, solid understanding of the rear peep and its role. It’s the understanding of the details which the true mastery occurs. Take this knowledge and run with it. Study it. Share it. I write not because I want to make a quick buck, but because I want to educate. This blog isn’t here for cash… it’s here to help make you a master of your weapon… for the good of the land, and the democratization of power into the hands of the people.