


Building your first AR15 lower receiver can be a daunting task. I have put together a visual guide to help you easily understand the process involved in putting together your first rifle. I hope this guide is helpful and informative to you. Building an AR15 is not as hard as people think, and once you finish your first rifle you will likely never purchase a complete rifle again! You will be building them yourself! In this tutorial, I use simple methods to build a fully functional AR15 lower receiver. You probably have all the tools you need in the garage. I like with the Palmetto State Armory standard receiver, it’s a known quality option and it won’t break the bank. Let’s get started!
Good luck with your first AR15 assembly!
DISCLAIMER: If you are unsure of any assembly steps or procedures, or have no experience with building and maintaining an AR15, seek professional assistance. New Rifleman L.L.C. bears no responsibility for any damage or incorrect assembly of your firearm. This guide is for visual reference only. If you lack the proper tools and experience, please have your rifle assembled by a professional armorer.
Quick Section Links
Click on the section you would like to jump to, or simply scroll down to begin
Parts Kit | Trigger Group | Trigger Guard | Magazine Catch | Bolt Catch | Safety, Grip, Rear Take-down Pin, Receiver Extension | Front Takedown Pin | Buffer and Spring
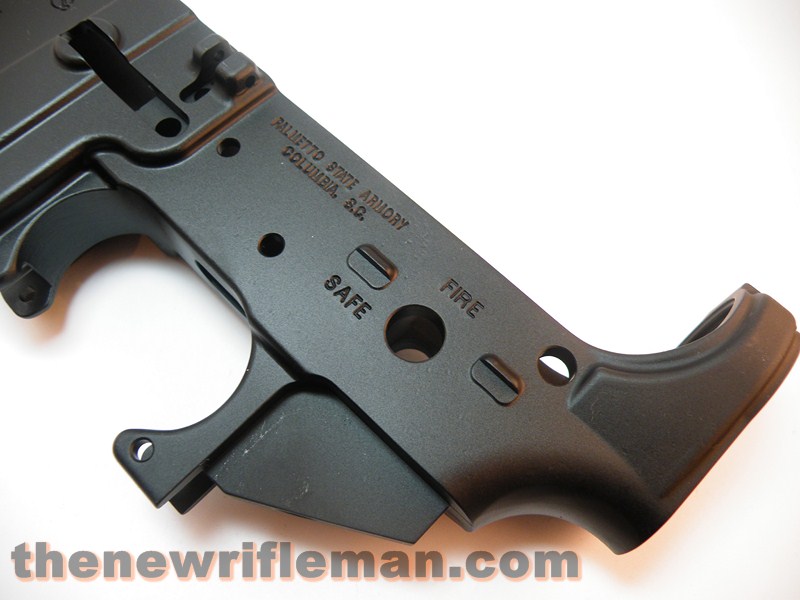
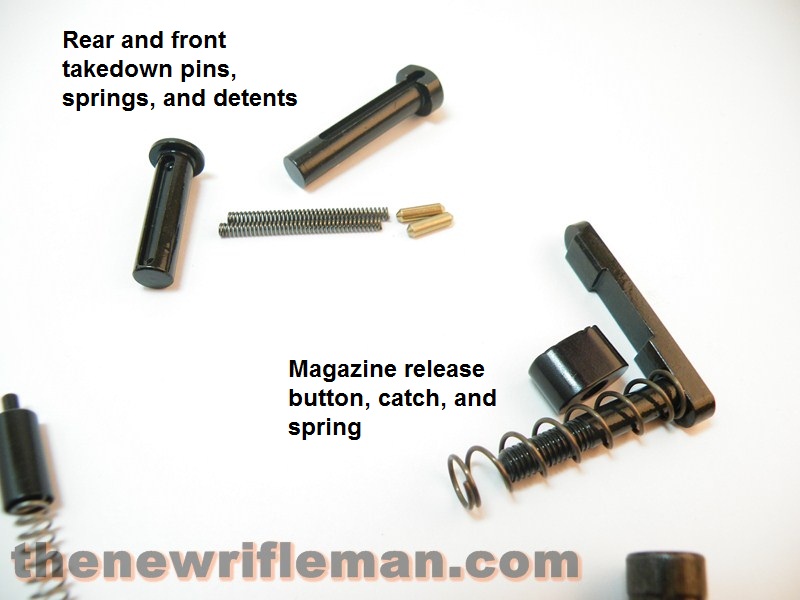
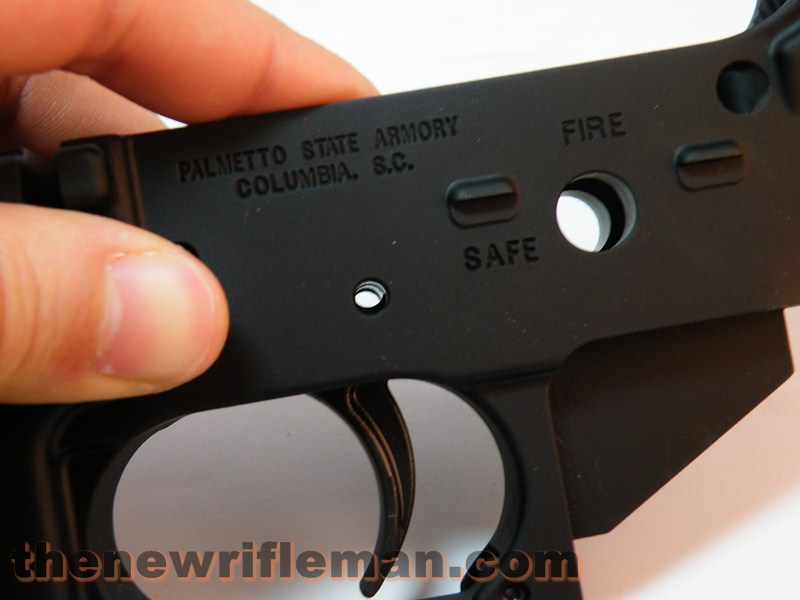
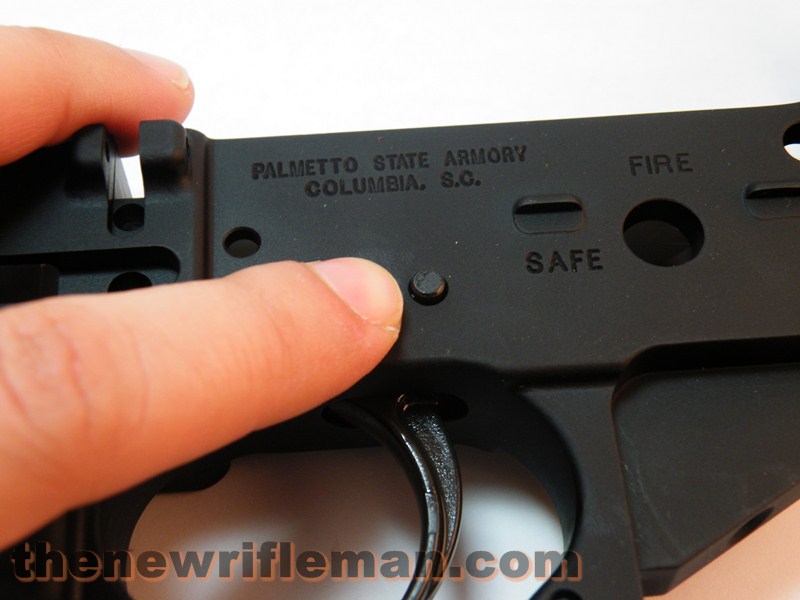
Parts Kit
I started with a Rock River Arms parts kit and a Palmetto State Armory lower receiver.

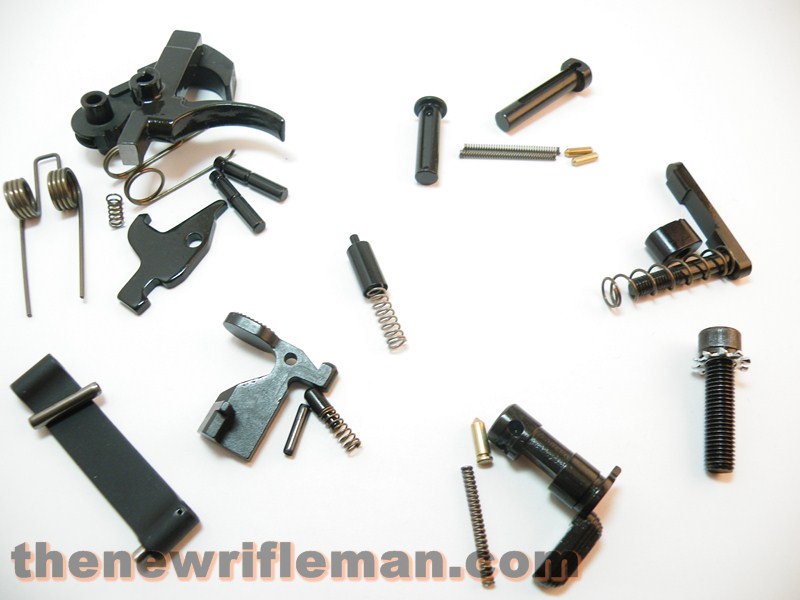
Gather the parts into their relative part groupings:
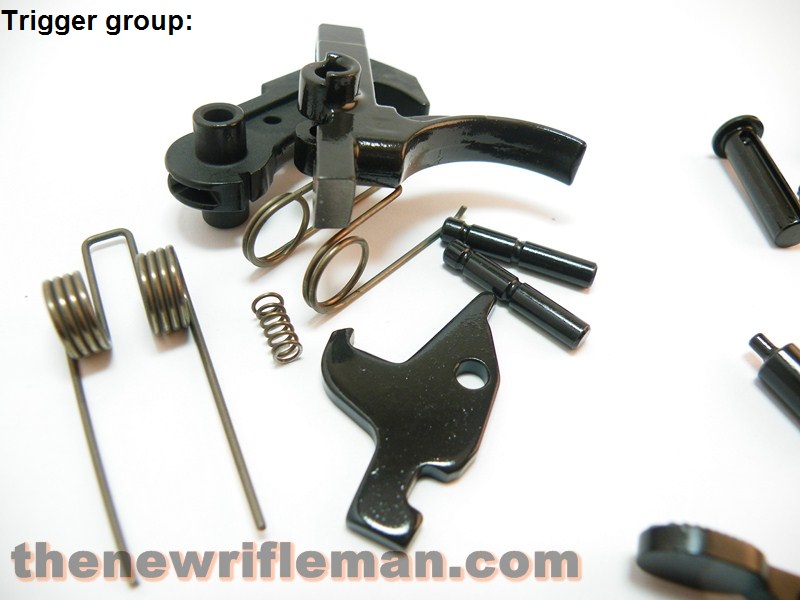
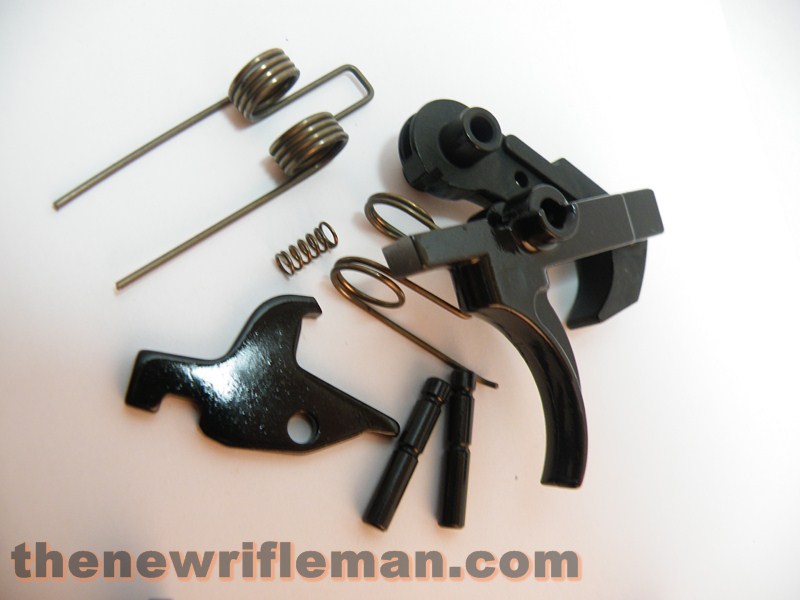
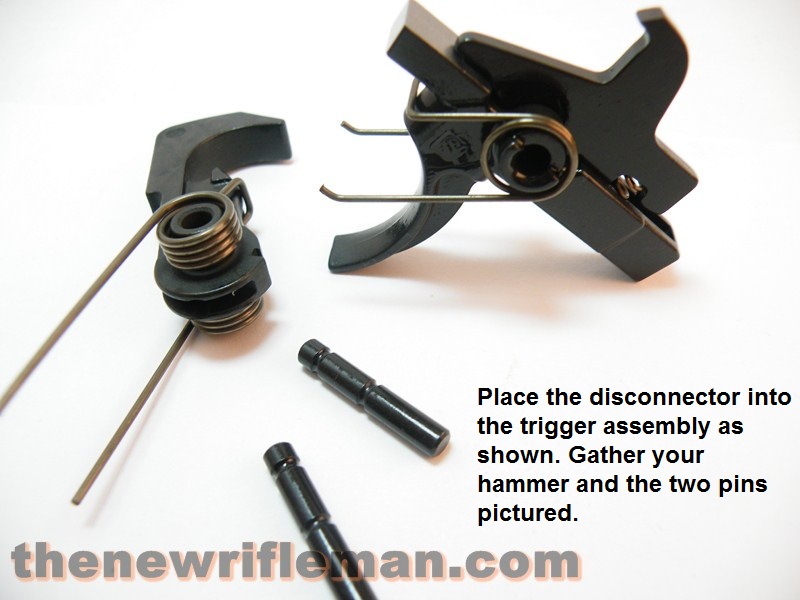
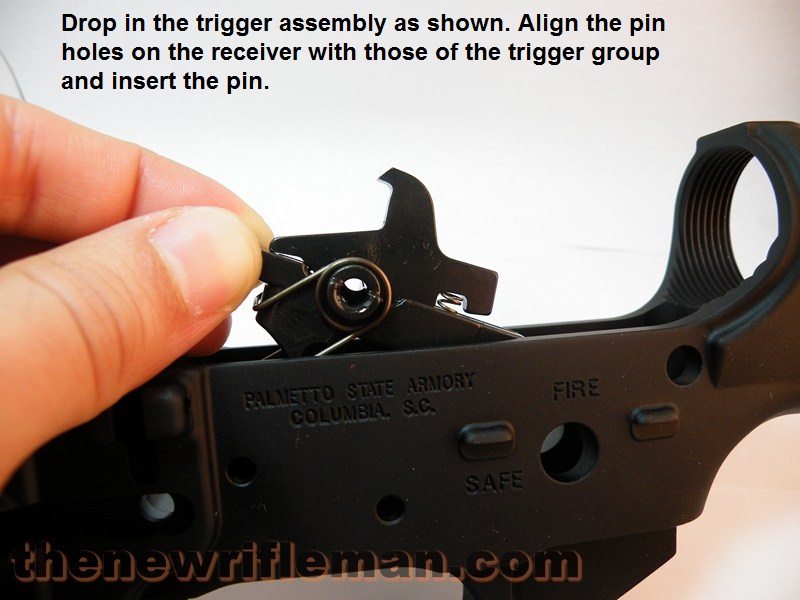
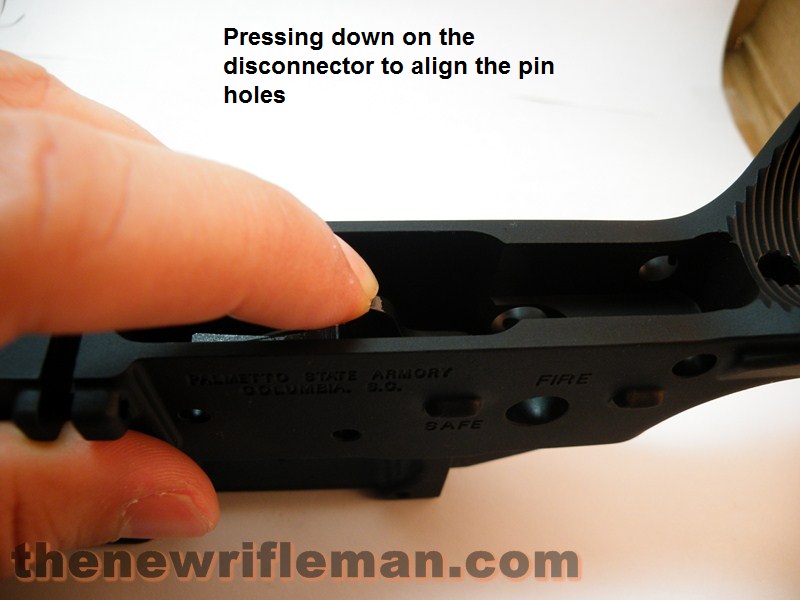
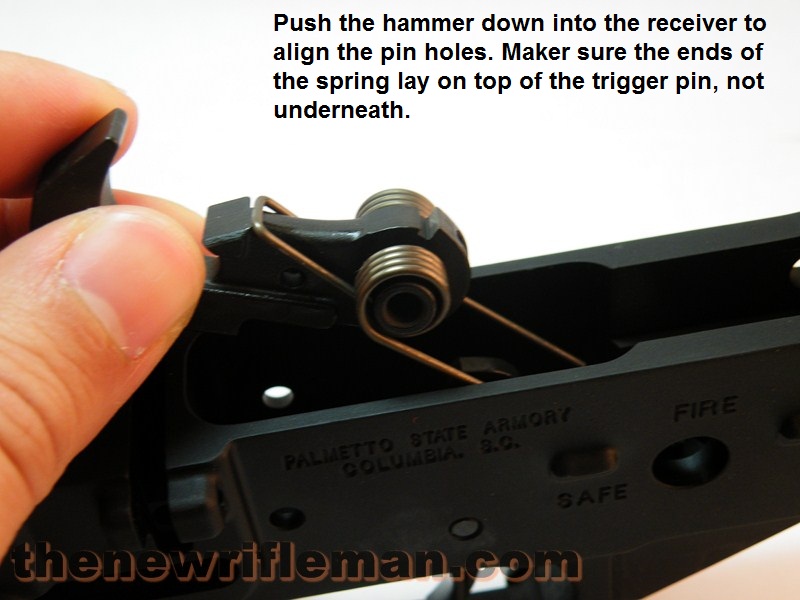
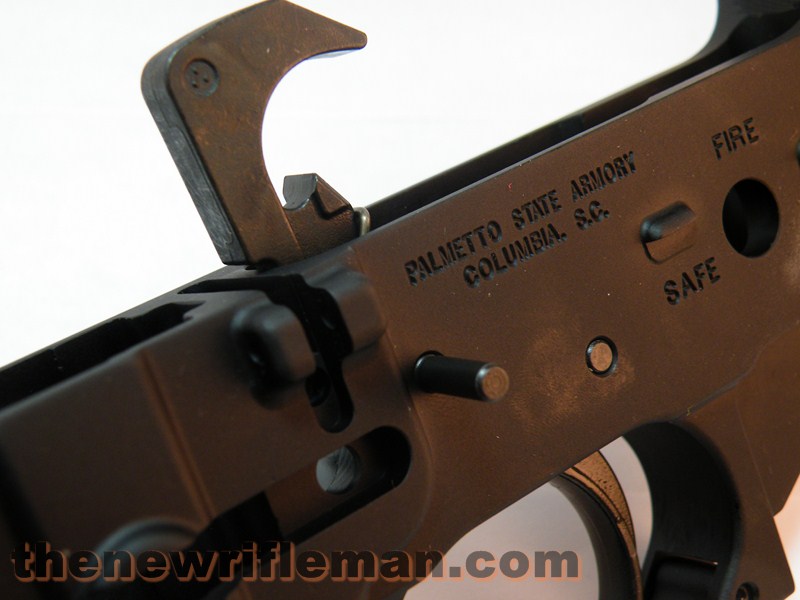
Trigger Group Assembly
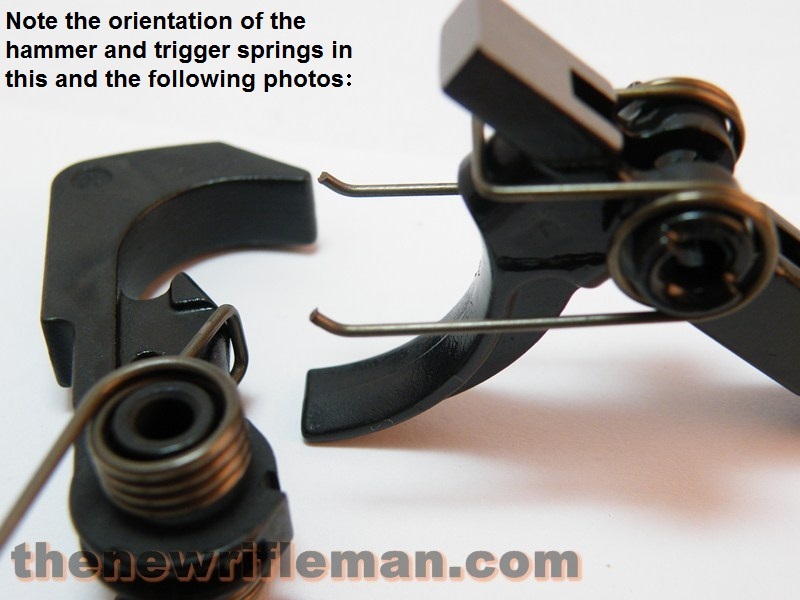
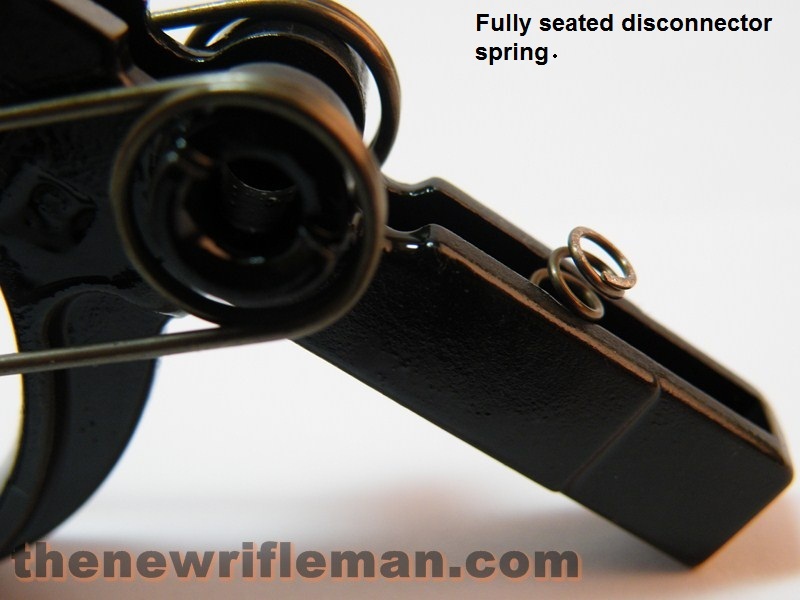
Trigger Group: pay close attention to the orientation of the springs on the hammer and trigger.
Also of note is that the hammer’s spring ends will sit on top of the trigger pin… do not slide them underneath.

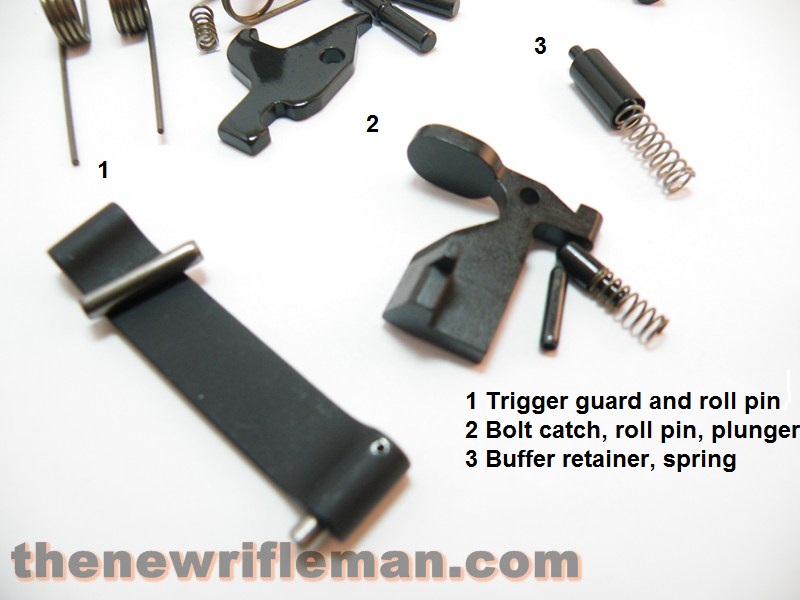
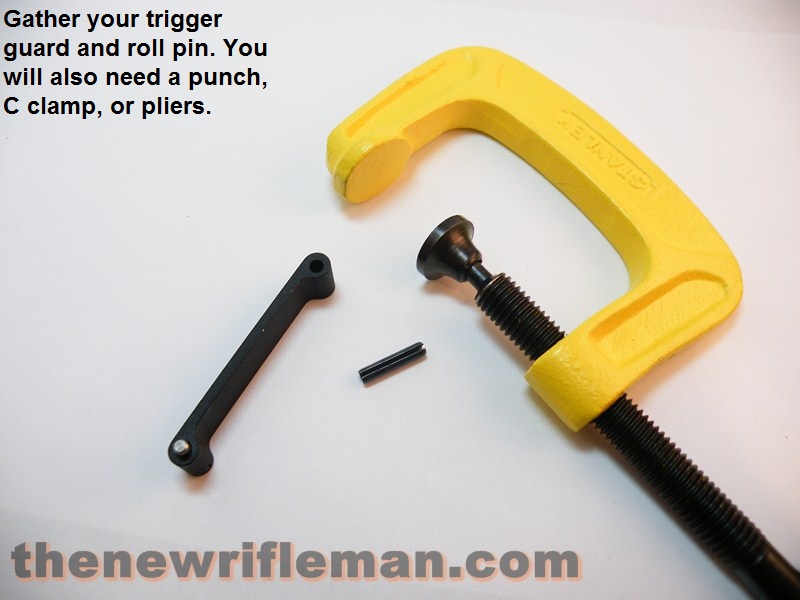
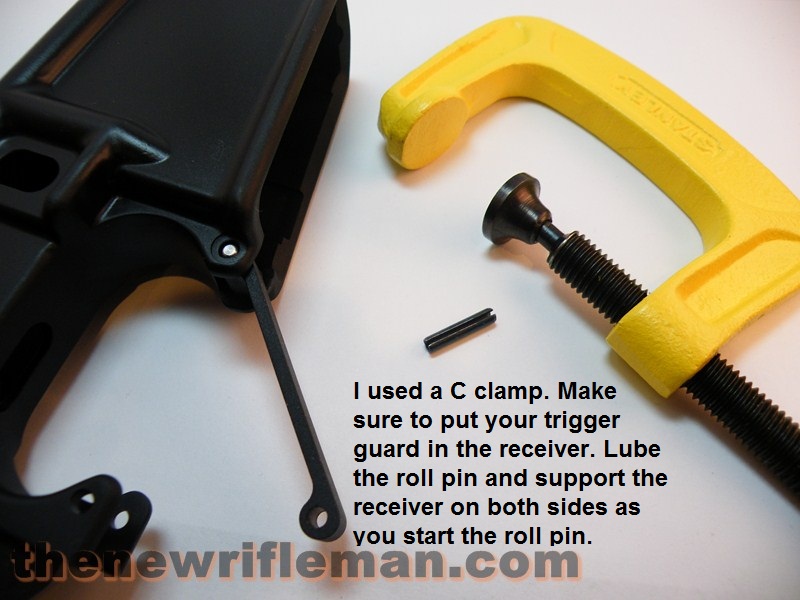
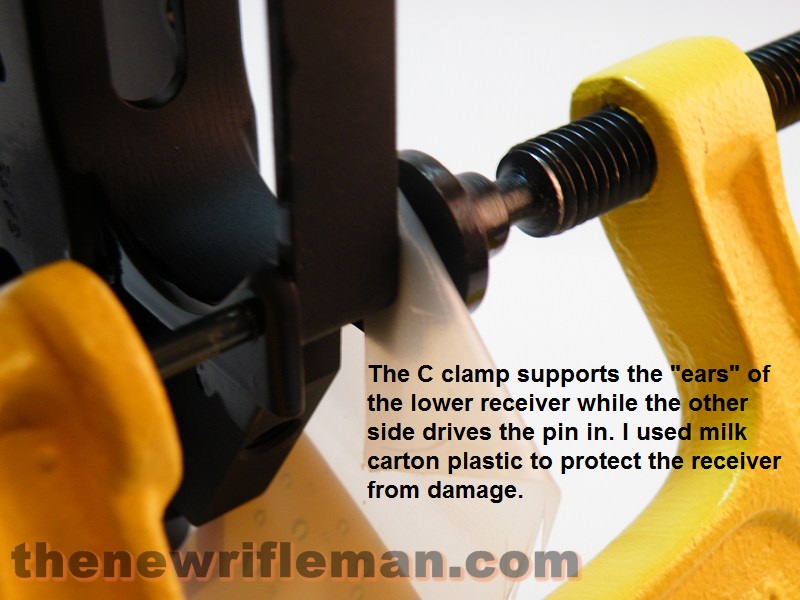
Trigger Guard Assembly
Next is the dreaded trigger guard. Though these pictures are technically out of order this won’t matter so much. Just install the trigger guard when you feel up to the task. Many new AR15 builders are intimidated by the “ears” of the lower receiver. Just support both ends and line up the trigger guard hole and you will be fine no matter what your method. Don’t start the roll pin without the trigger guard in place though for it adds support for the ears of the lower.
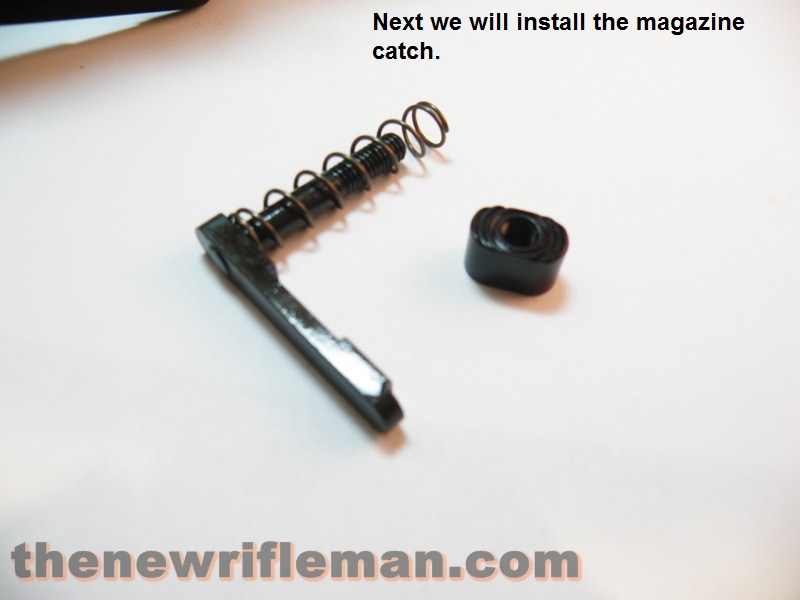
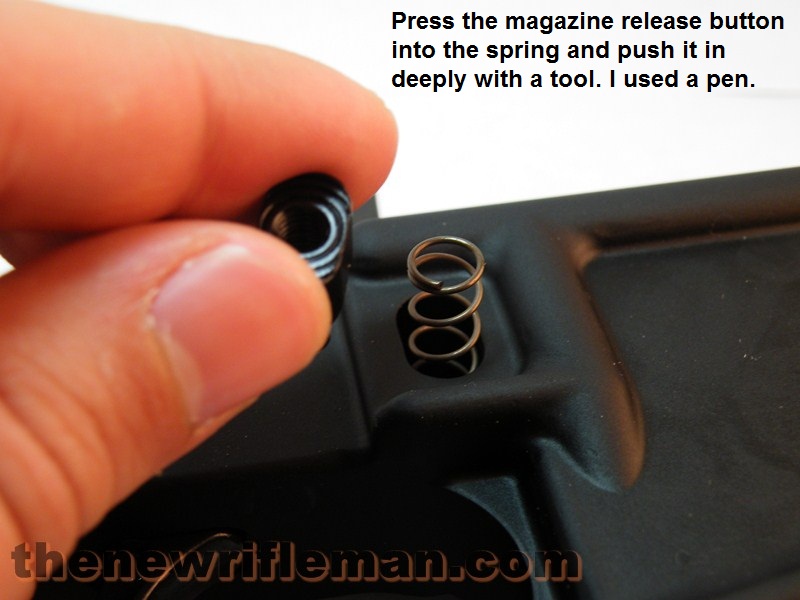
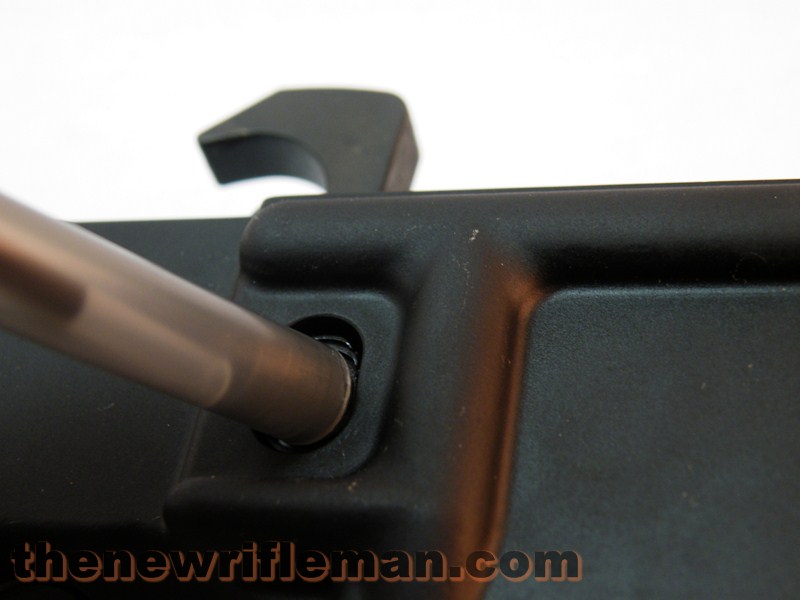
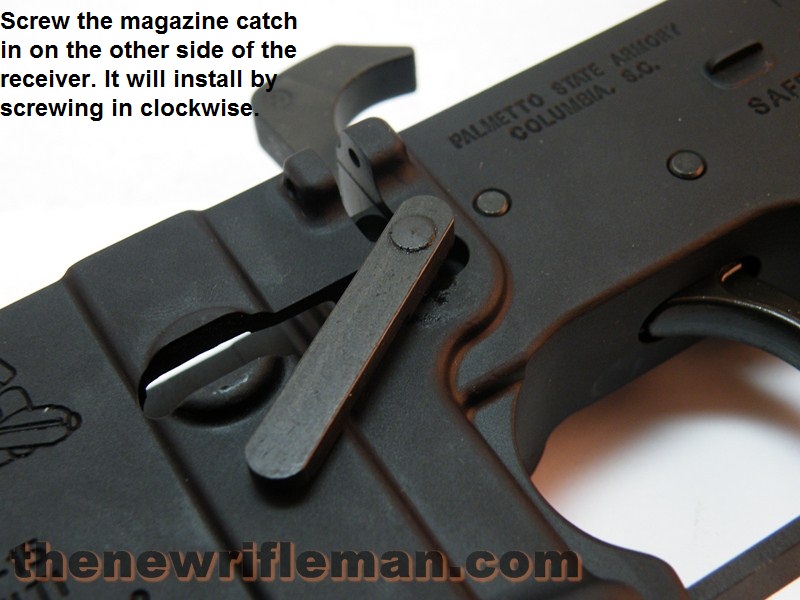
Magazine Catch Assembly
Magazine catch: a pretty simple component to install.
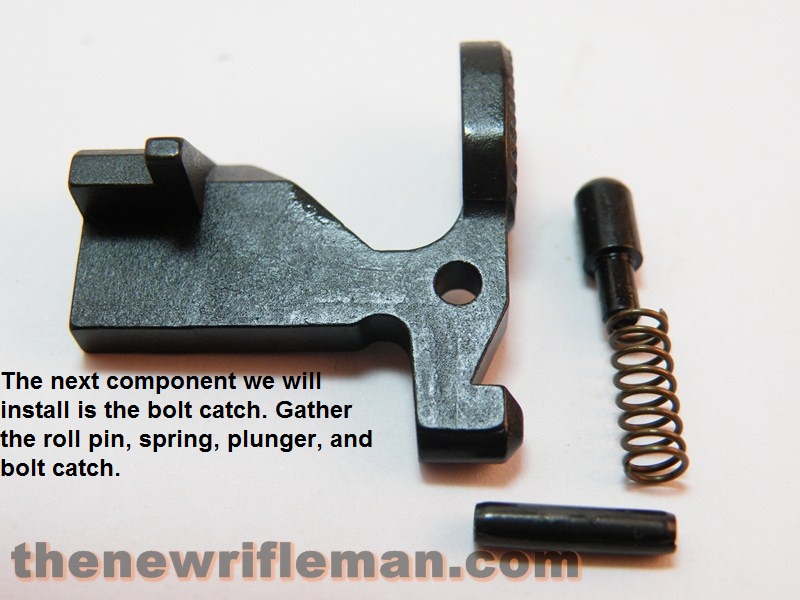
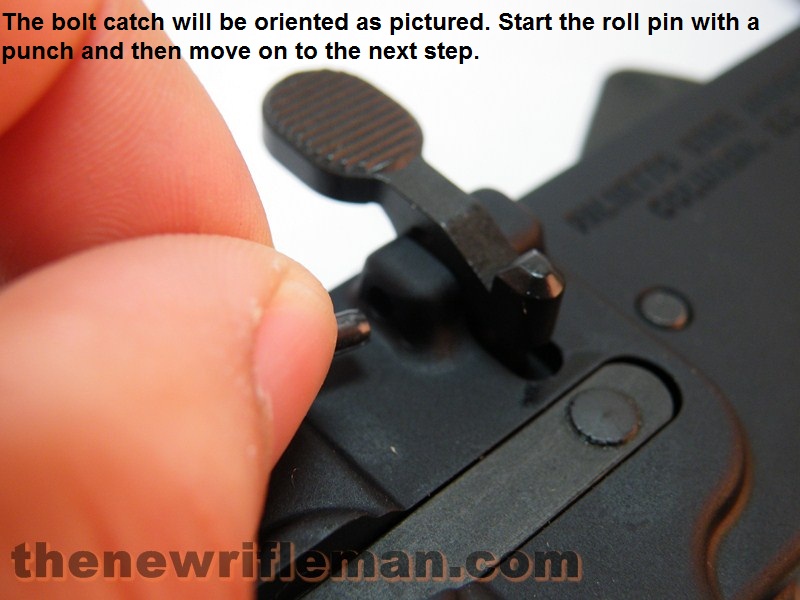
Bolt Catch Assembly
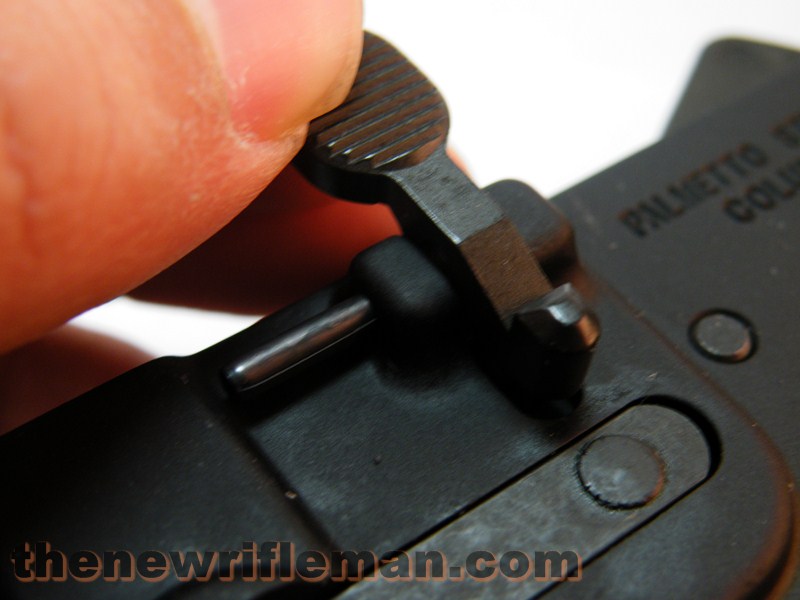
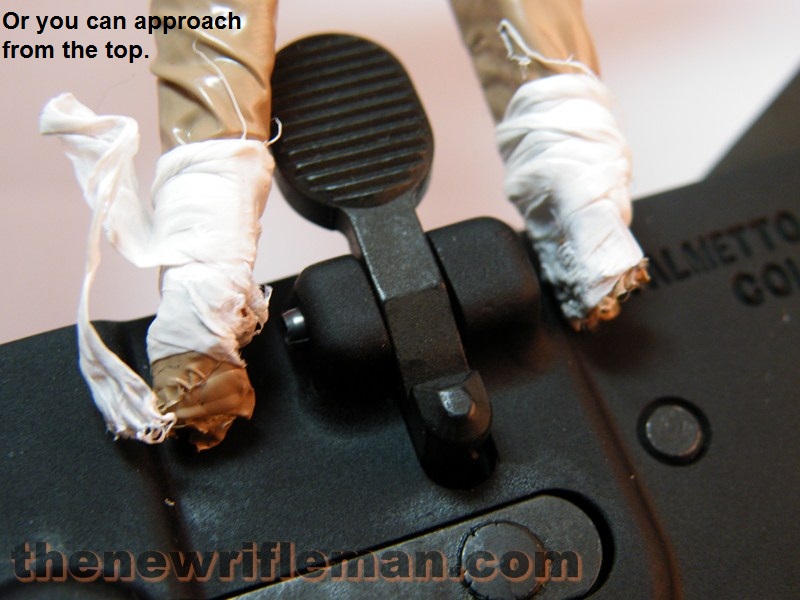
Bolt catch: another simple assembly. Here you need a special punch to keep from scratching your lower receiver. I don’t have this tool so I utilize pliers comfortably wrapped in thick tape. I have used this method on four lower receivers to date. I have started the roll pin with a normal punch but after that, I use the pliers to squeeze it into place. Simple and effective. The spring and plunger go into the hole just below where the roll-pin will go.
![DSCF1854 [800x600 Watermark]](https://www.thenewrifleman.com/wp-content/uploads/2013/07/DSCF1854-800x600-Watermark.jpg)
Drop the spring and plunger into the hole in the receiver before placing the bolt catch assembly in the slot

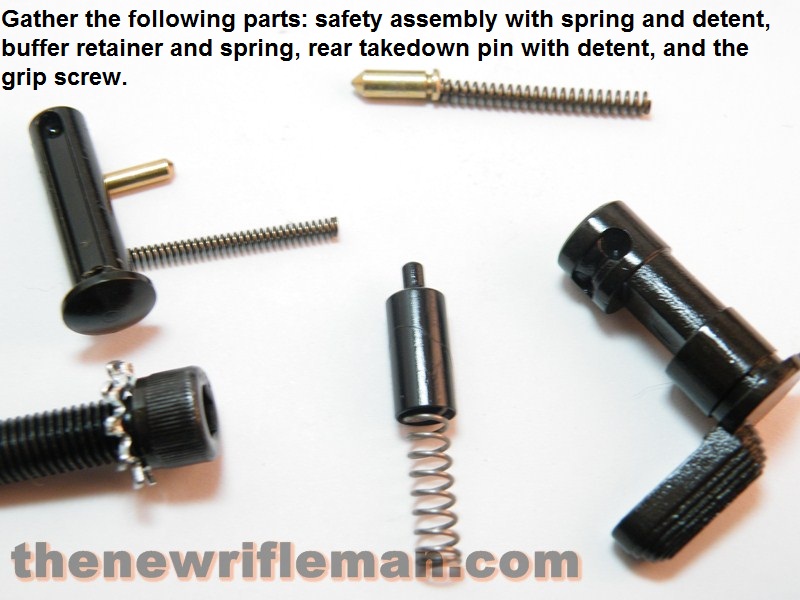
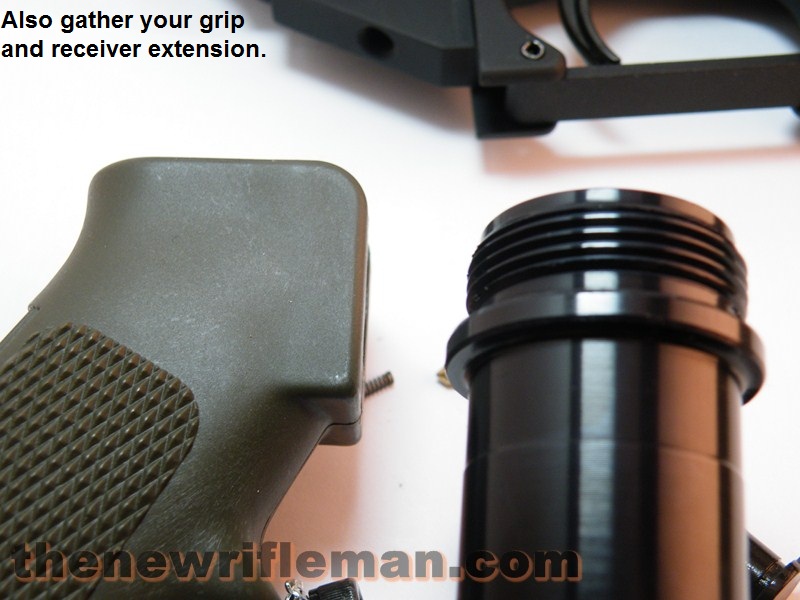
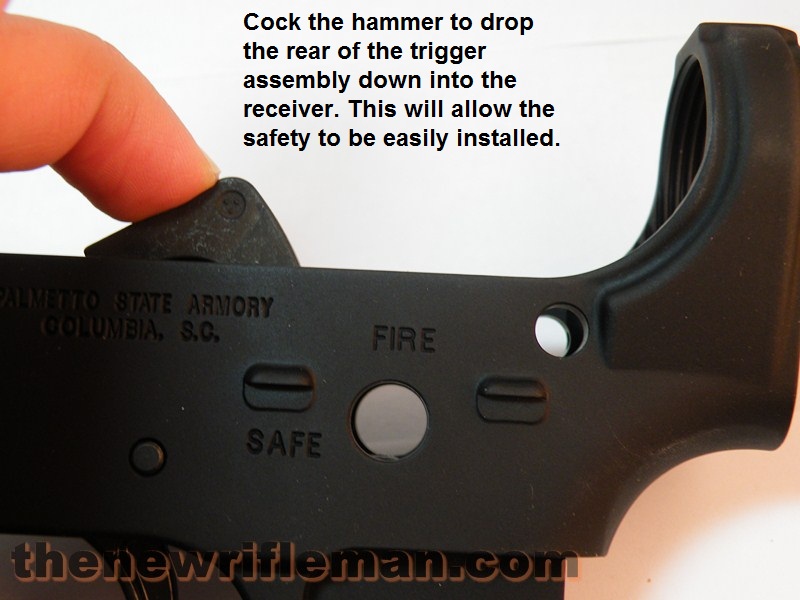
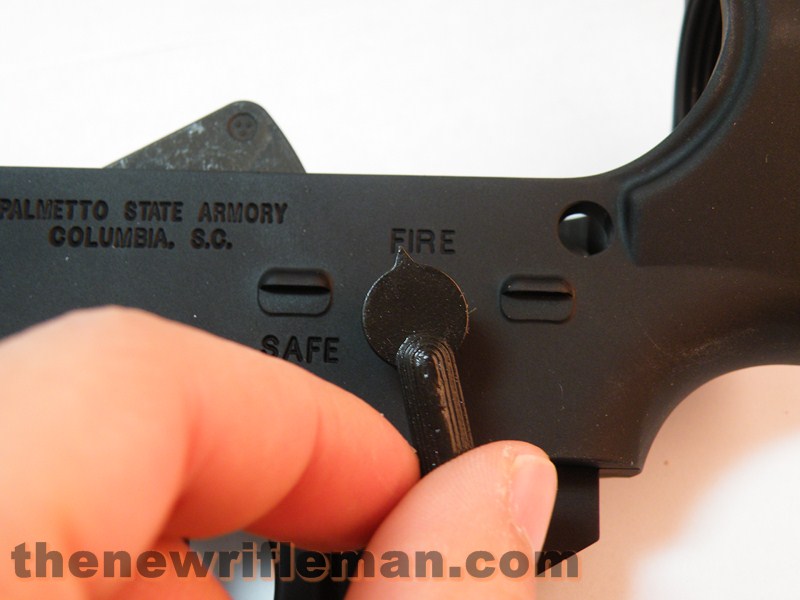
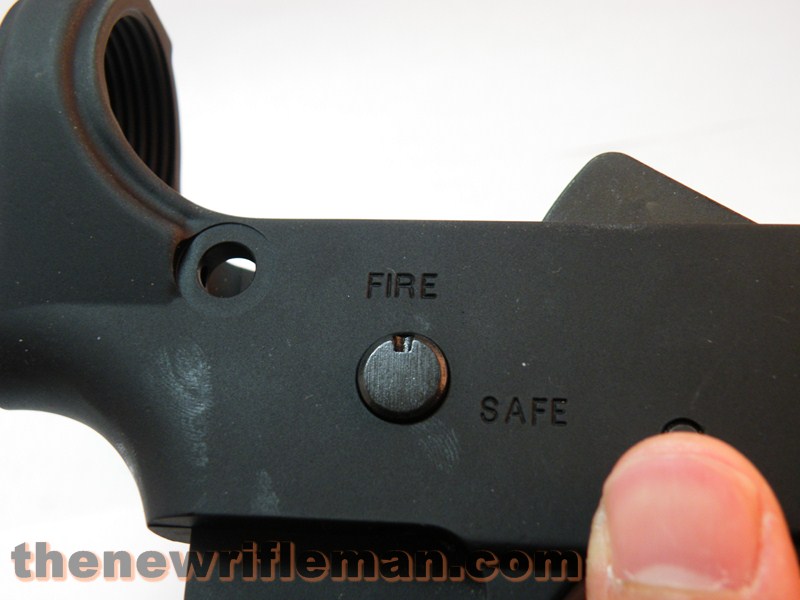
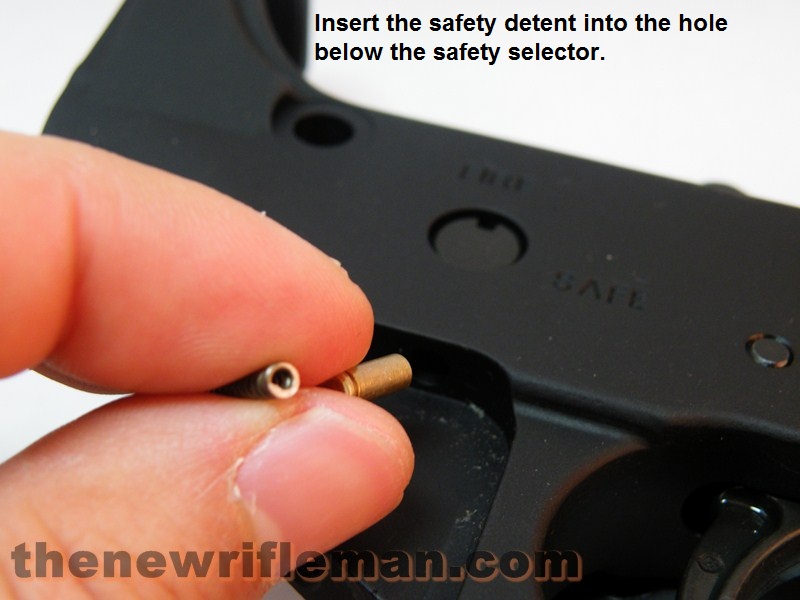
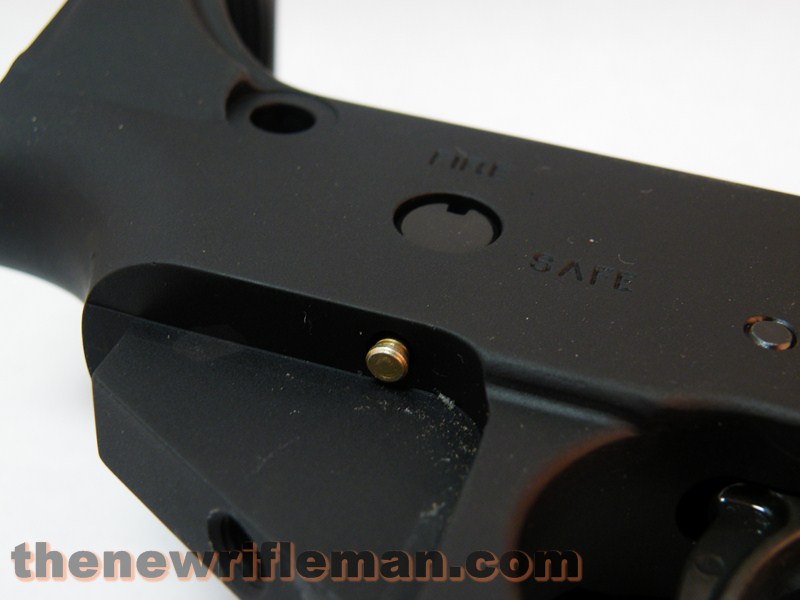
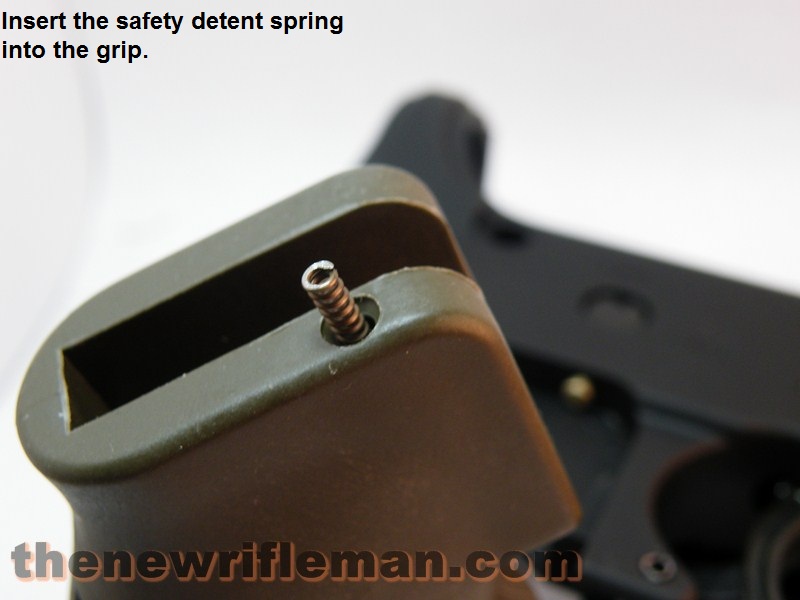
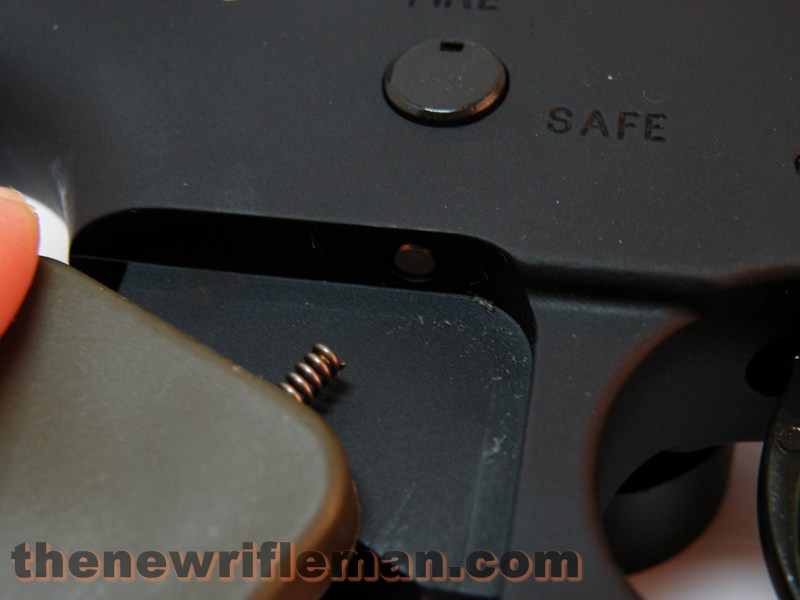
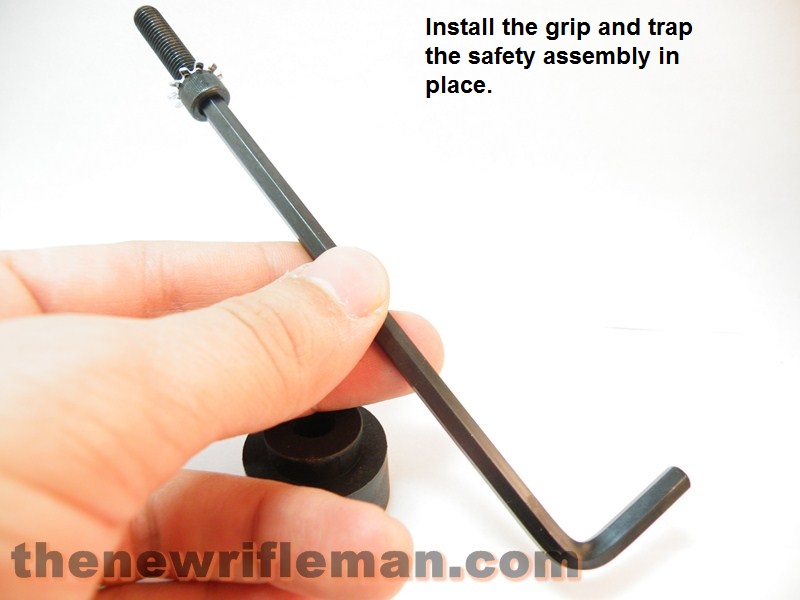
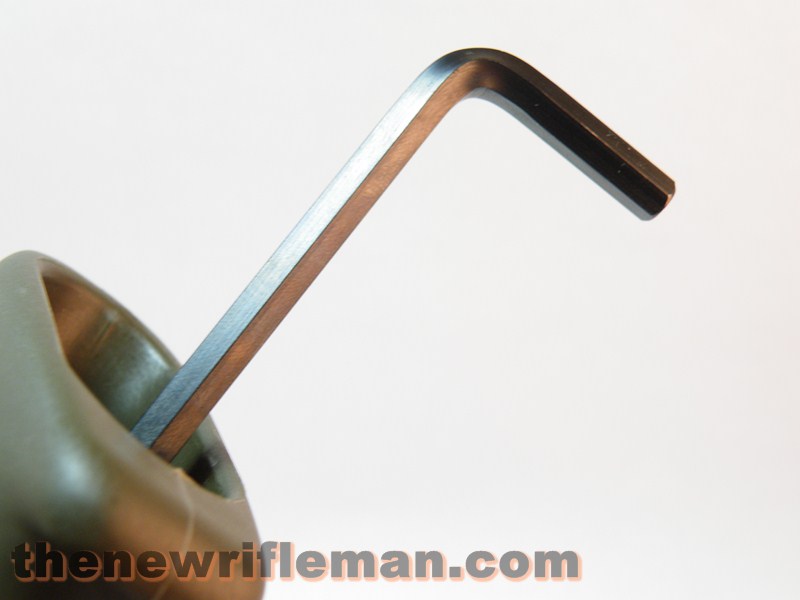
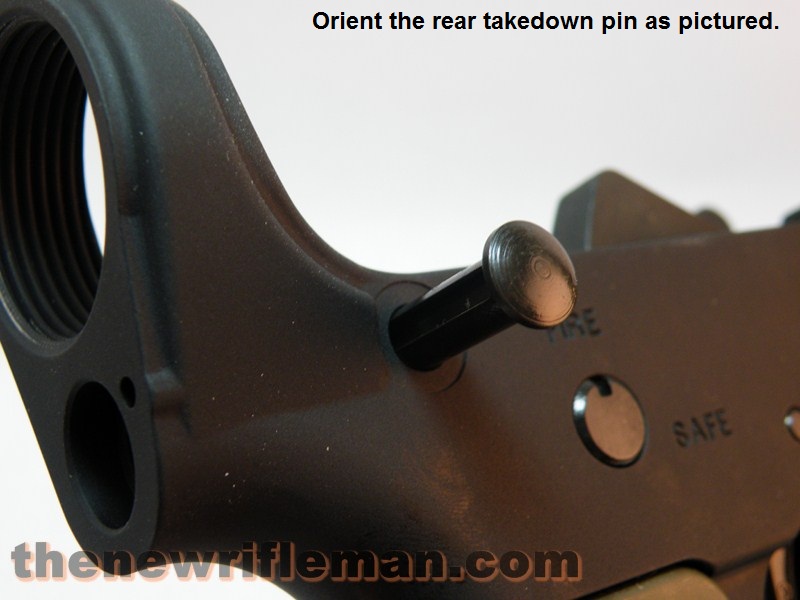
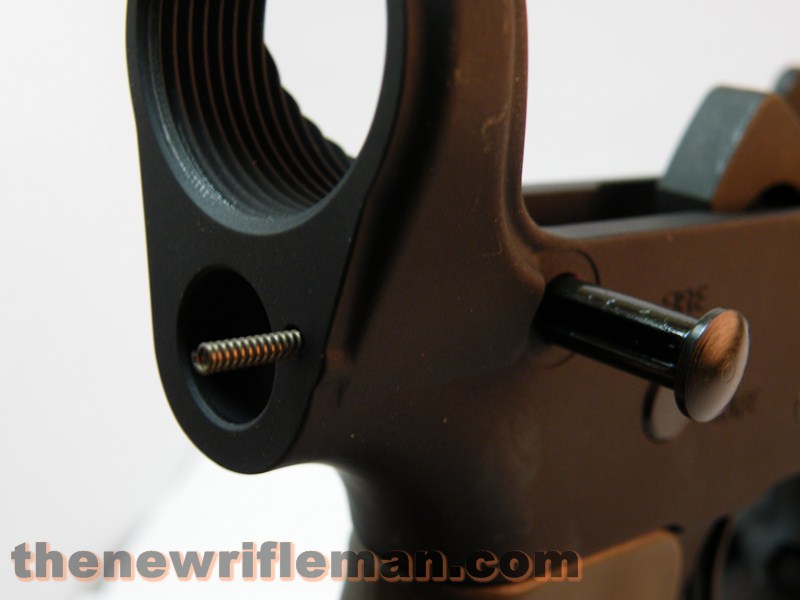
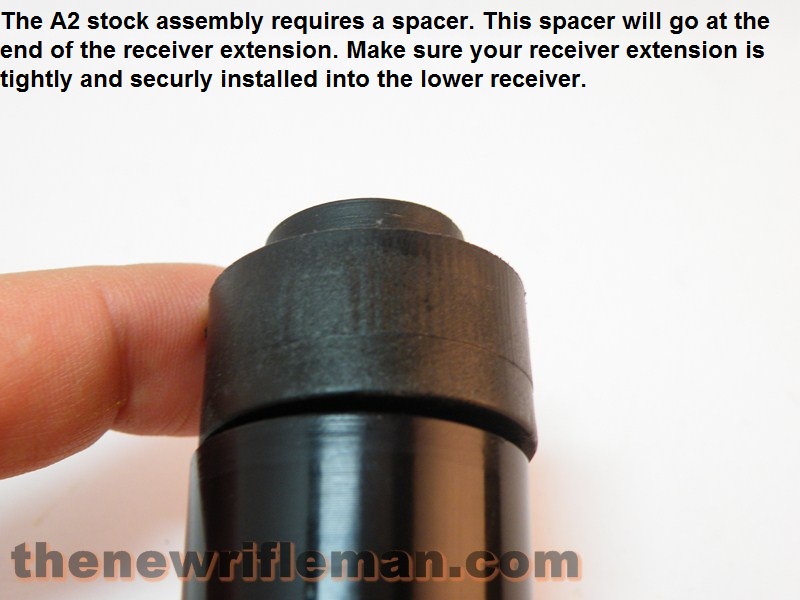
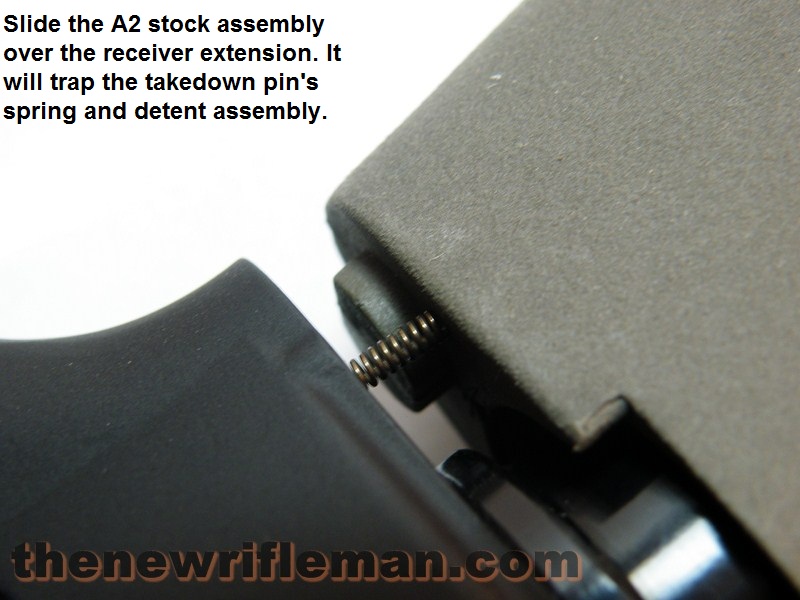
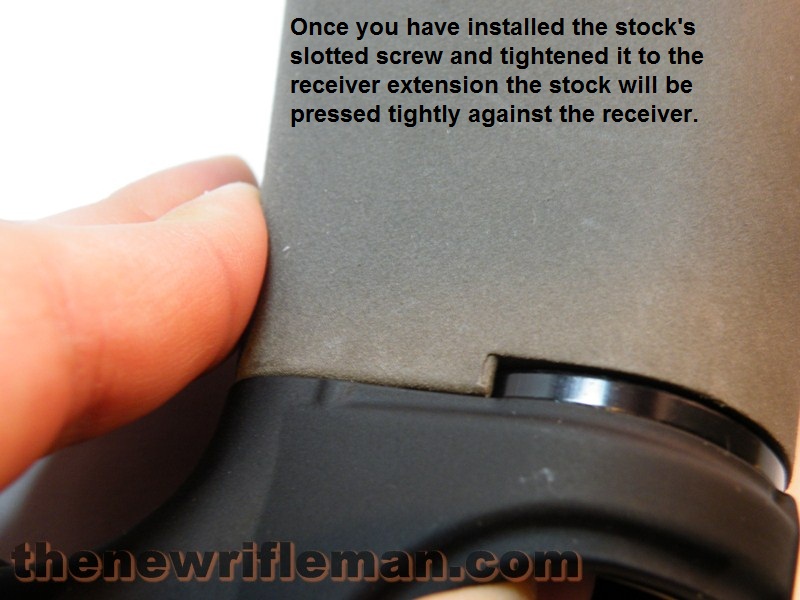
Safety / Grip / Rear Takedown Pin / Receiver Extension Assembly
The Rear End: let’s install your safety, grip, rear takedown pin, and receiver extension.

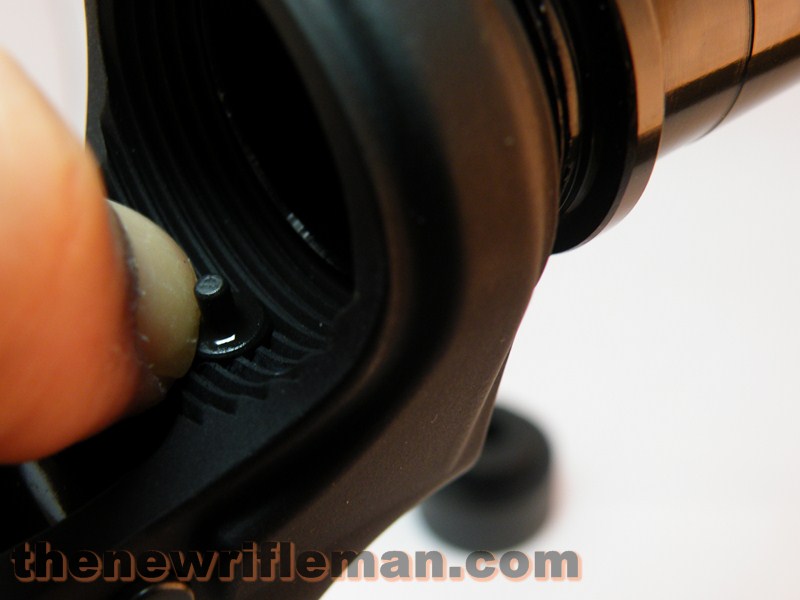

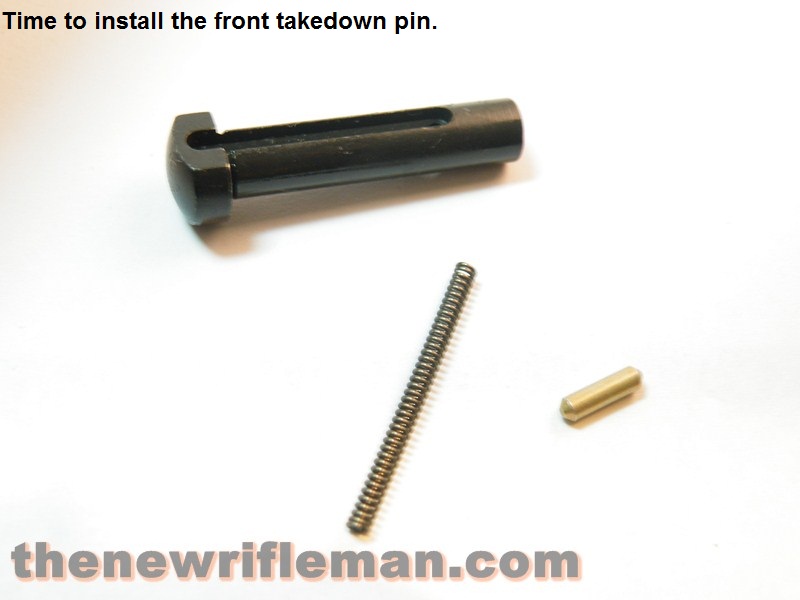
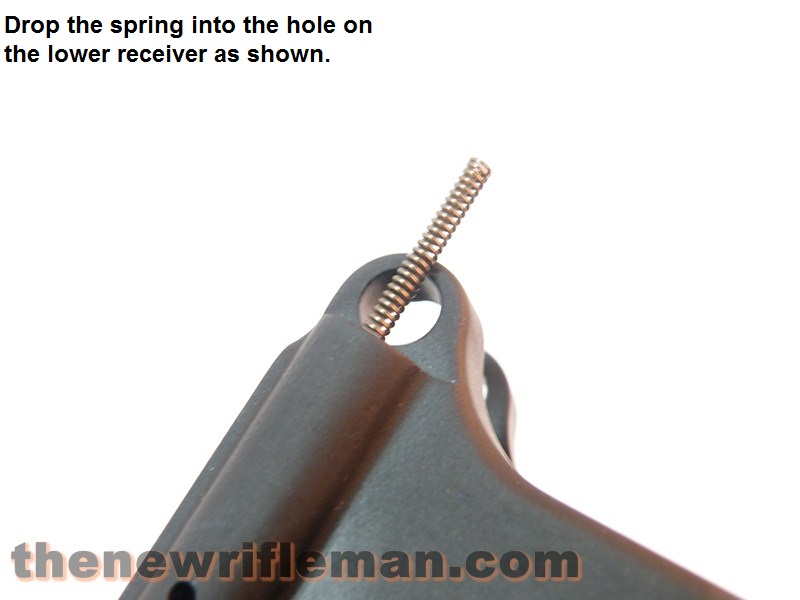
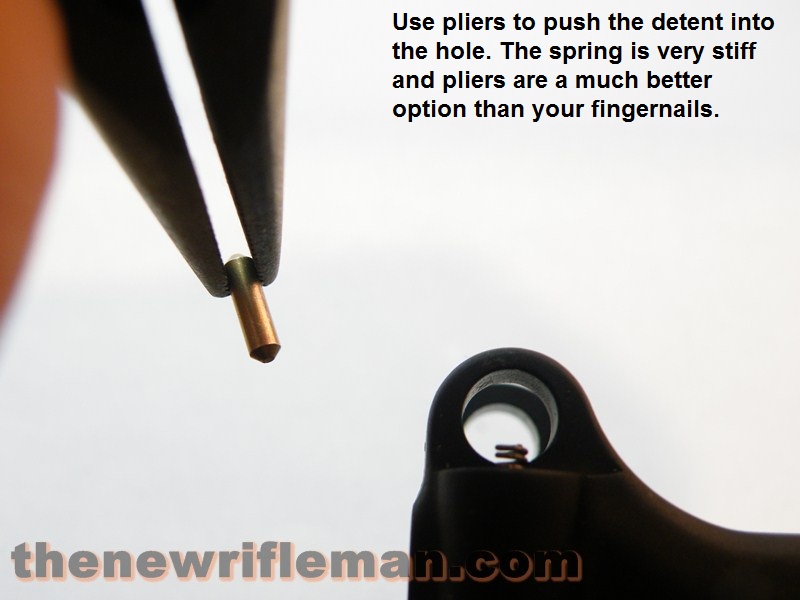
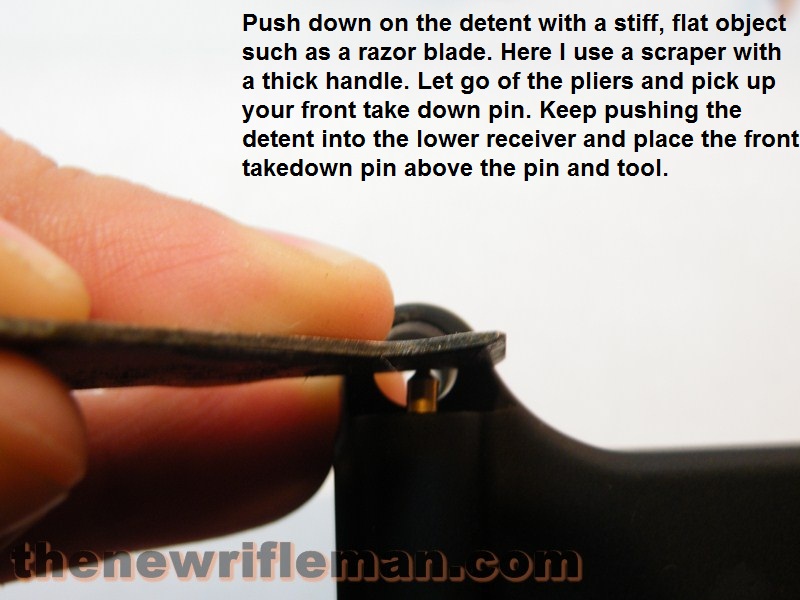
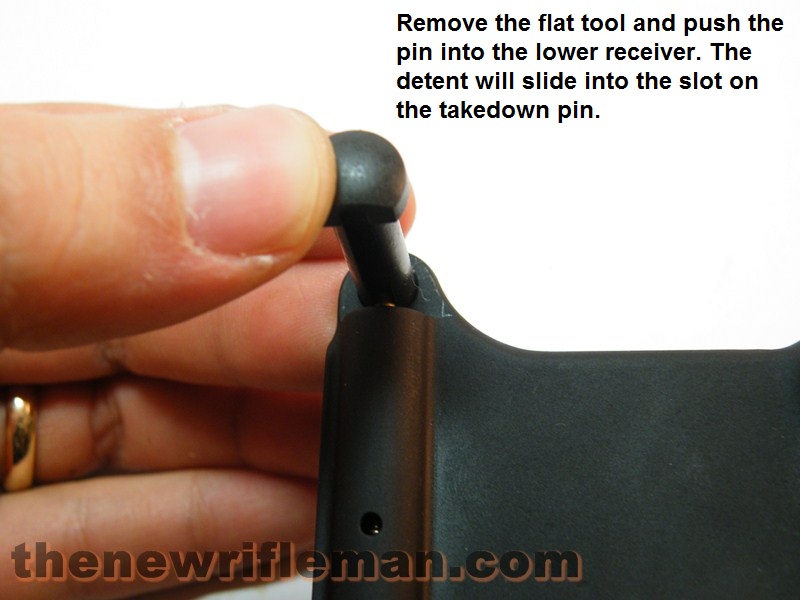
Front Takedown Pin Assembly
The Front Takedown Pin: follow this tried and true method. Be careful as one slip can and will send the detent flying. Do this in an uncluttered area where you can easily find the detent should it pop out and fly off into the sunset. I built this inside my light-box for safety. Not too many places the detent can go inside a box.
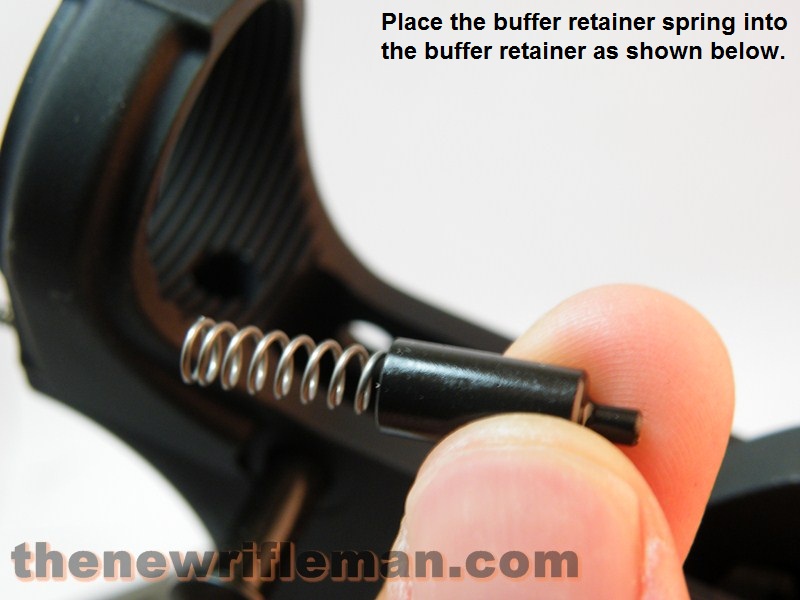
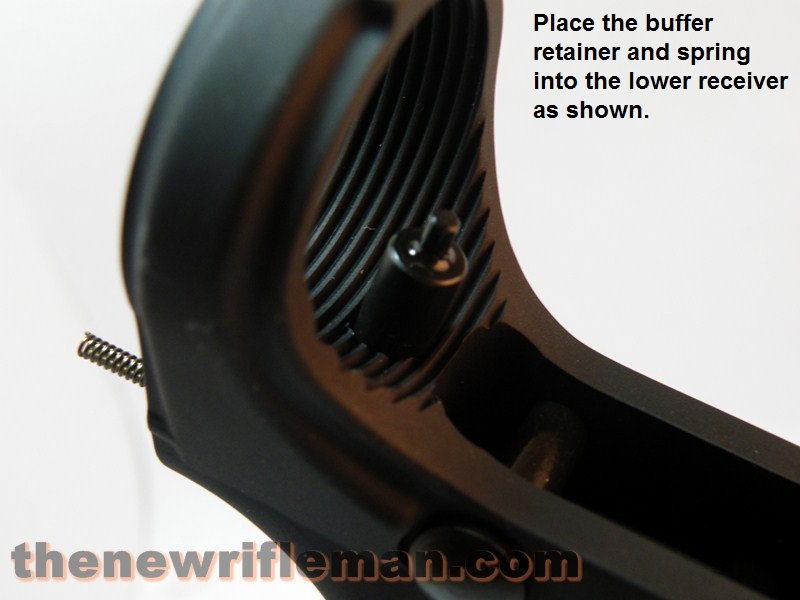
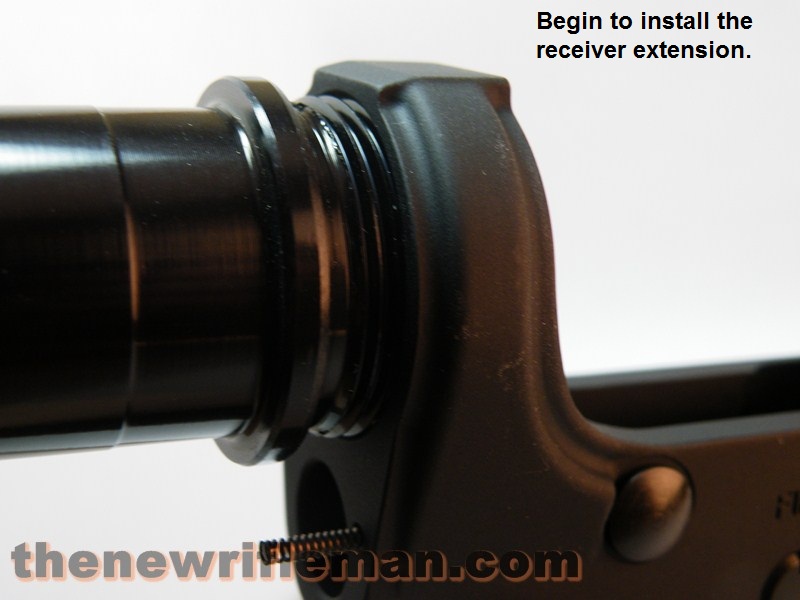
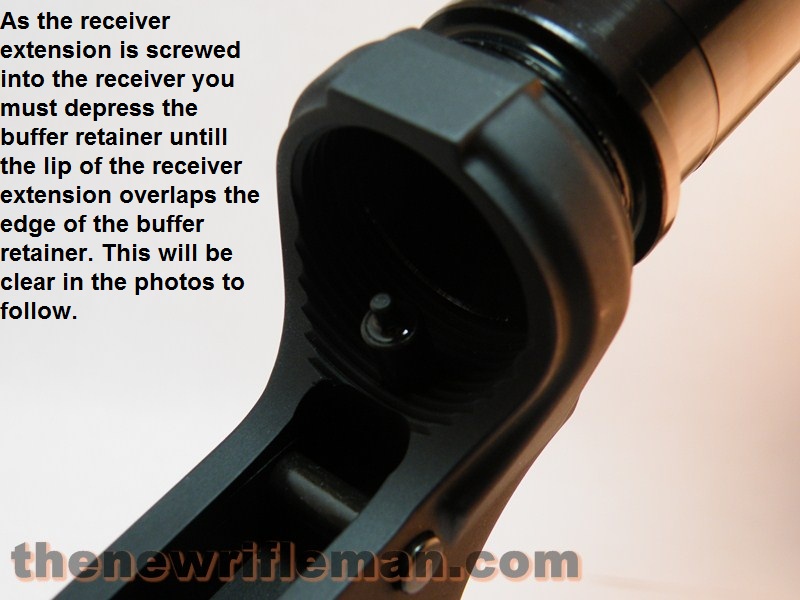
Buffer and Spring Assembly
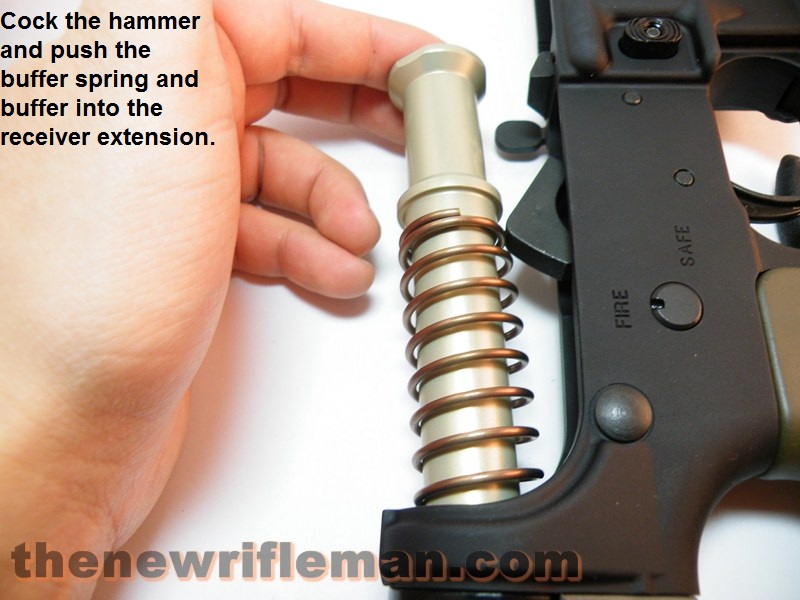
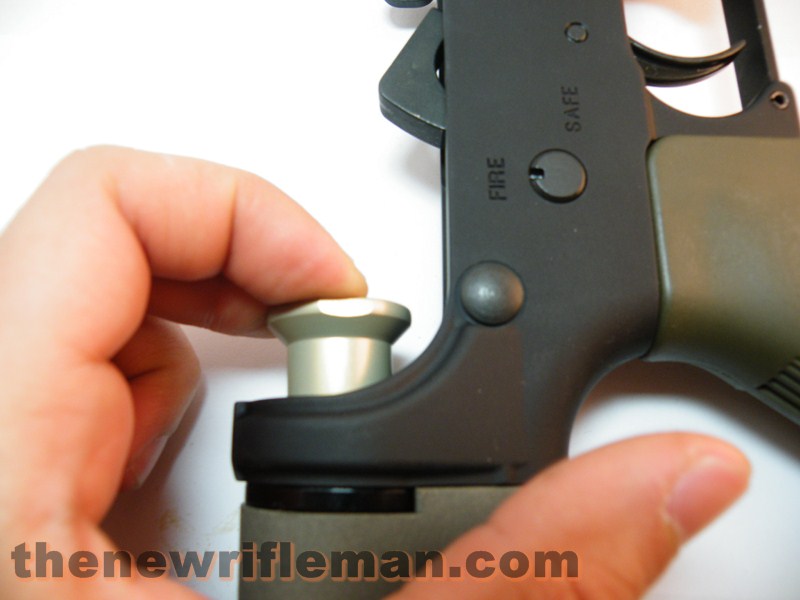
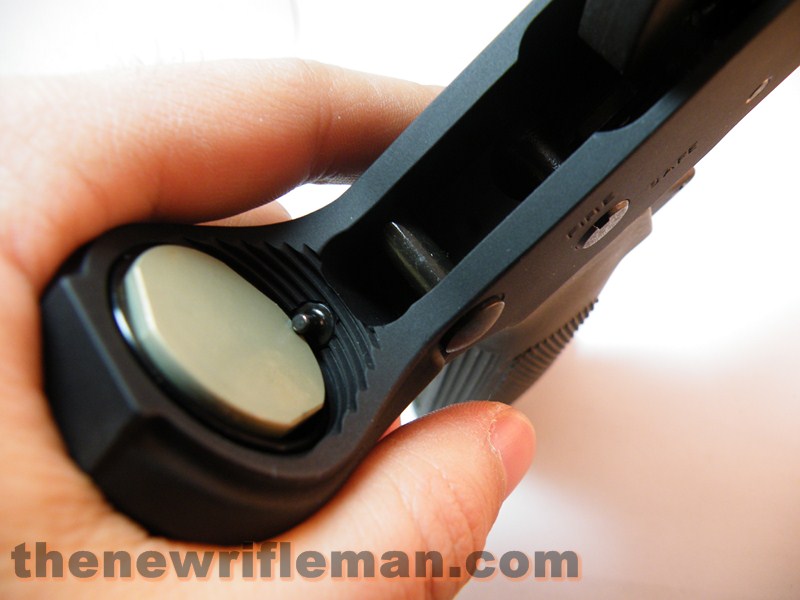
Your AR 15 lower receiver is now finished! I hope you found this tutorial helpful! Please feel free to share it to help others with their rifle build and good luck with your new rifle!

Enjoy this Guide? See all the guides in The Guide Index
Want some additional reading? Please visit American Rifleman “Building an AR15 at home”!